Blog
October 15, 2020

There are many tools and approaches to testing and automating API testing. But while different tools are fit for different needs, Apache JMeter™ has a big advantage for users who load test. With JMeter, you can easily convert your functional API tests to performance tests by adding more users and loops to your Thread Group.
In this blog post, we will focus on functional testing REST APIs with JSON responses, and then parse the response with a JSON extractor. Nowadays, most developers prefer to use REST API to access web services. This can be used, for example, to pass data from backend services to mobile devices. We will then parse the response with a JSON extractor.
Ready to unlock JMeter's full load testing potential? Get started pairing your JMeter tests with BlazeMeter today for free.
Back to topWhat is a JSON Extractor?
A JSON extractor is a tool that helps execute JSON Path expressions against JSON responses. Written with the JavaScript object, the JSON extractor exchanges information between the client and server, and then stores the result into a JMeter Variable.
Related Reading: Explore Five Advantages Your Peers are Discovering with Continuous Testing >>
Back to topExample of Using a JSON Extractor
REST API Functional Test
To demo a test, we can use the https://jsonplaceholder.typicode.com/ website, which allows you to demo sending the requests and getting the responses.
Here is an example of such an API request:
- Site link – https://jsonplaceholder.typicode.com
- Endpoint - /posts
- Id of the post - /1
If you click on this link or copy-paste into a browser, you will see the response. The response is in JSON format:
{
userId: 1,
id: 1,
title: "sunt aut facere repellat provident occaecati excepturi optio reprehenderit",
body: "quia et suscipit suscipit recusandae consequuntur expedita et cum reprehenderit molestiae ut ut quas totam nostrum rerum est autem sunt rem eveniet architecto"
}
From this response, we can get the following values:
- userId = 1
- Id = 1
- Title = "sunt aut facere repellat provident occaecati excepturi optio reprehenderit",
- Body ="quia et suscipit suscipit recusandae consequuntur expedita et cum reprehenderit molestiae ut ut quas totam nostrum rerum est autem sunt rem eveniet architecto"
Now, let’s create a test for this request in JMeter.
1. First, make sure you have JMeter installed on your computer.
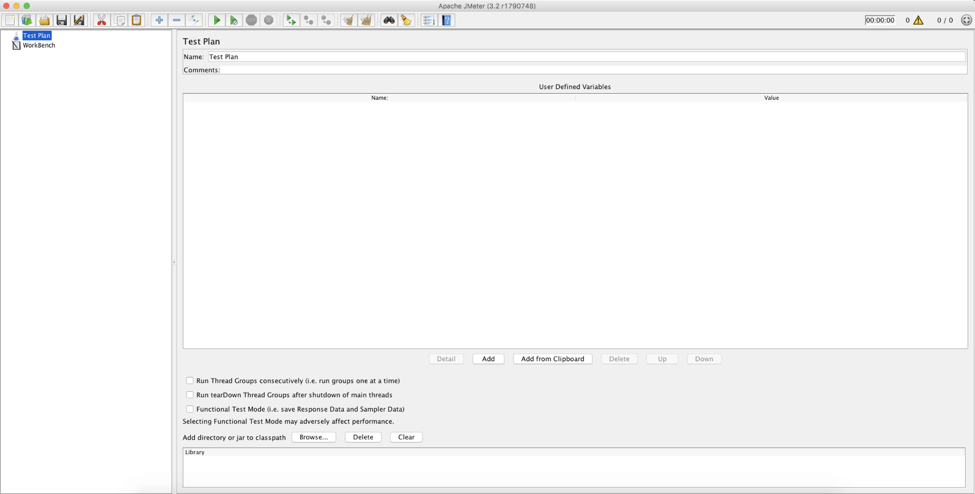
2. After JMeter is installed and opened, you should see an empty test plan:
3. Add the Thread Group:
- Right click on the name of your test plan
- Select ‘Add’
- Threads (Users)
- Thread Group
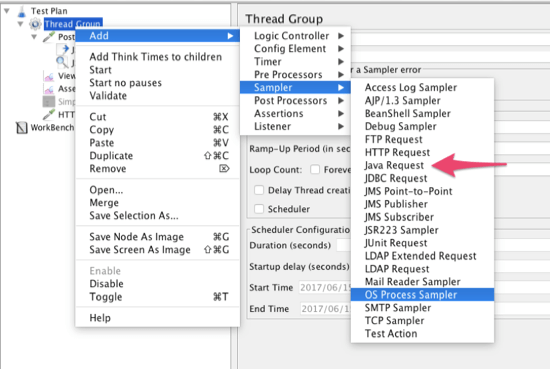
4. Add the HTTP request sampler:
- Right click on Thread Group (This way the sampler will be added to this Thread Group)
- Sampler
- HTTP Request
5. Click on this HTTP Request on the left panel and fill in the requested data as following:
- Protocol [http] – https (all requests will be done with SSL)
- Server Name or IP - jsonplaceholder.typicode.com/
- Method – GET
- Path - posts/1
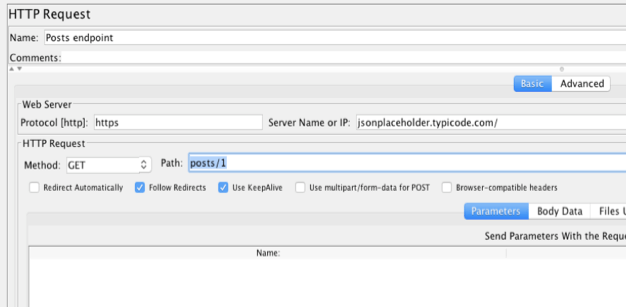
This is all we need to create the GET request.
Back to topAdding a JSON Extractor to Parse a JSON Response
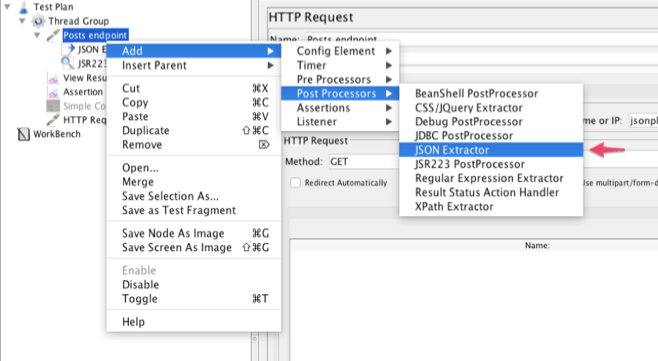
6. Now we need to parse the JSON response, so we can verify the values we got. Let’s add the JSON Extractor for this purpose.
- Right click on HTTP Request
- Post Processors
- JSON extractor
7. The JSON extractor requires us to follow a few steps so we can process the JSON correctly.
- Name – we can choose any name. This name will appear on the left panel
- Comment – explain what this extractor does, if you want to
- Apply to – we will use the defaulted Main Sample Only.
The options:
- Main sample only - the assertion only applies to the main sample
- Sub-samples only - the assertion only applies to the sub-samples
- Main sample and sub-samples - the assertion applies to both
- JMeter Variable - the assertion is applied to the contents of the named variable
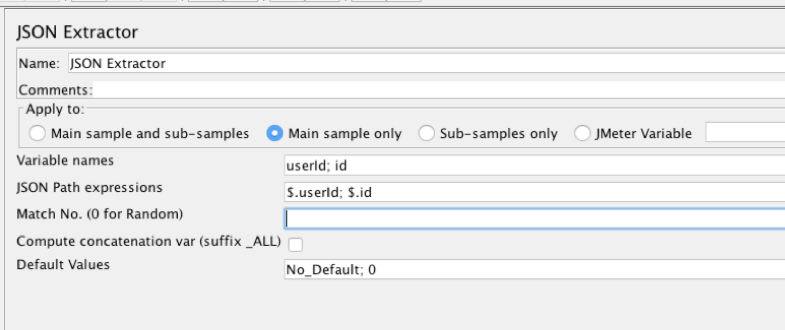
- Variable Names - this field is required. We must put all the variables that we will use later in our assertions. Use a semi-colon to separate the names of the variables that will contain the results of JSON-PATH expressions. The number must match the number of JSON-PATH expressions). In this example we used - userId; id - we created two variables userId and id. Try to use names that make sense to you.
- JSON Path Expressions - this field is required as well. Here we’re telling what value we want to get from the JSON response and put it in our variable created in step 4. Learn more here. Use a semi-colon to separate the JSON-PATH expressions Here too the number must match number of variables). In this example we used - $.userId; $.id - we took the userId value from the JSON response and put it in the userId variable. The first value here always goes to first variable. The id value will be placed in the id variable.
- Default Values - Sometimes our JSON can bring an empty value, so we can use a default value for that. Use No_Default to get a null value. In this example we will use No_Default; 0. Here as well use a semi-colon to separate default values, and the numbers must also match.
- Match No. (0 for Random) - If the JSON Path query leads to many results, you can choose which one(s) to extract as Variables:
- 0 : means random (Default Value)
- -1 means extract all results, they will be named as _N (where N goes from 1 to Number of results) (userId_5 for example)
- X : means extract the Xth result. If this Xth is greater than the number of matches, then nothing is returned and the default value will be used
We will leave this blank as we don’t have results with the same names.
- Compute concatenation var - if many results are found, the plugin will concatenate them by using the ‘,’ separator and store it in a var named _ALL
8. Now we will add a JSR223 Assertion:
- Right click on HTTP Request
- Assertions
- JSR223 Assertion
By using this assertion, we can Assert the values that we extracted from the JSON response.
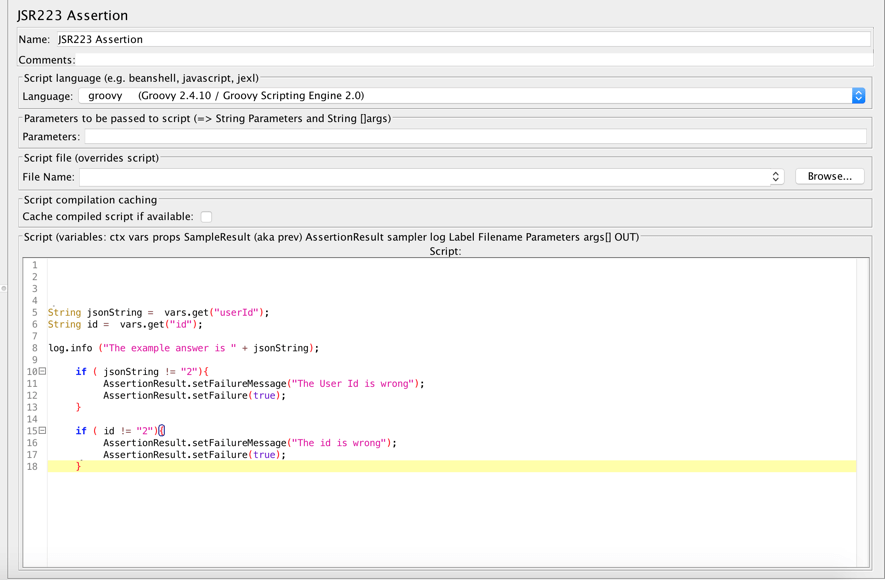
9. Make sure the language is Groovy (for this example), and paste in the following code:
String jsonString =  vars.get("userId");
    String id =  vars.get("id");
    log.info ("The example answer is " + jsonString);
    	if (	jsonString != "2"){
    		AssertionResult.setFailureMessage("The User Id is wrong");
    	    	AssertionResult.setFailure(true);
    	}
    	if (	id != "2"){
    		AssertionResult.setFailureMessage("The id is wrong");
    	    	AssertionResult.setFailure(true);
    	}
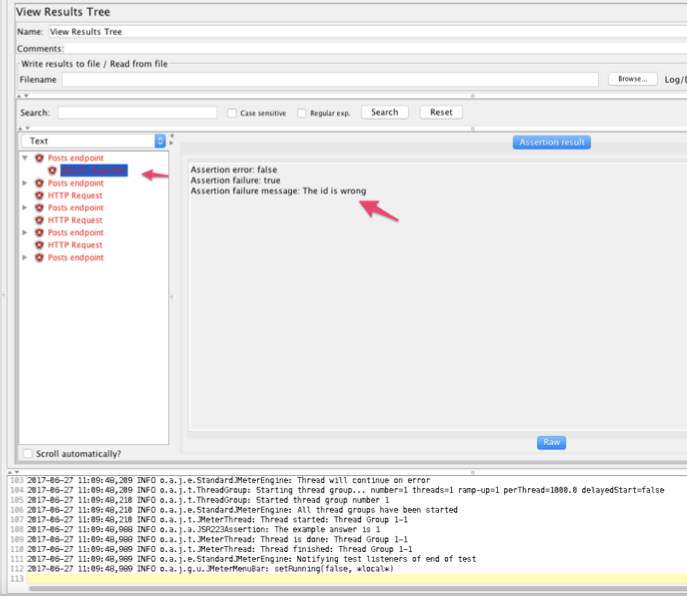
10. We used id != "2" to fail the test. We can see the test is failing in the View Results Tree listener:
- Right click on HTTP Request
- Listener
- View Results Tree
11. Run the test. You will see the test has failed and you will see the message we added in our Groovy script:
Now let’s fix the test.
12. Change jsonString != "2” to jsonString != "1 and id != "2"to id != "1"
13. Run the test again:
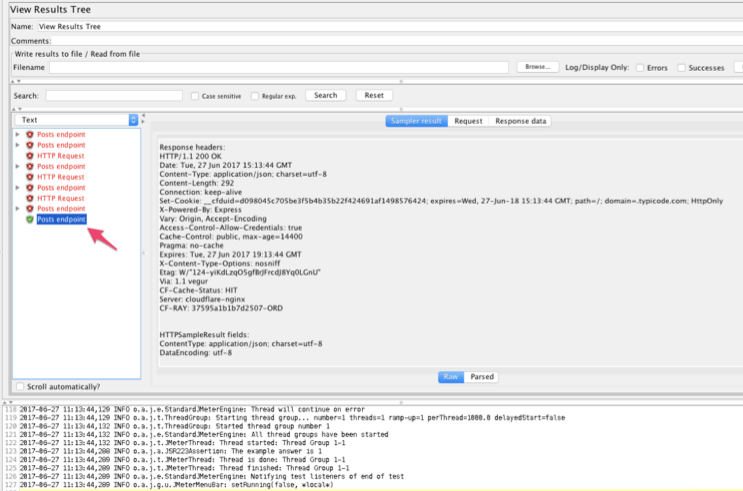
The test passed!
Now that we have the full test, we can expand it to a test plan, and use it for load testing. As you can see, JMeter is a great tool for functional API testing as well, and it enables use to stay in the same JMeter environment.
To learn more JMeter, check out BlazeMeter university.
Upgrade your JMeter tests immediately by getting started with BlazeMeter for free today!