Blog
December 16, 2020

There are many open-source API testing tools out there, such as Postman and JMeter. But for those who prefer to stick to a text editor and command line, Taurus is the ideal choice. You can write your entire test script via a single YAML file in a text editor, then feed it through Taurus with a simple command in the terminal.
Today, I’ll walk you through setting up your Taurus API testing. To create this simple API test, we will use BlazeMeter’s own “blazedemo” test site, which is a fake flight booking site we can safely use for any manner of test we come up with.
Table of Contents
Why Use Taurus for API Testing?
There are many benefits to using Taurus for API testing, including:
- Self-explanatory, powerful dashboards that you can easily share with your team.
- Integration capabilities with different open-source frameworks.
- Compatibility with the CI/CD pipeline.
- The simplicity of running your existing JMeter scripts.
How to Do API Testing With Taurus
Script Structure
Taurus is simple to learn but complex to master. Meaning that for a simple, straightforward Taurus API test, we can create everything we need quickly and easily. There’s no need to learn any scripting language; instead, all you need to know to get started is Taurus’ basic YAML structure.
Execution Section
You will always start your YAML file with an “execution” section which defines what type of test Taurus will execute and what basic load configuration will be in place:
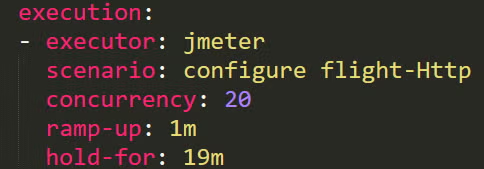
Tabulation is very important here, which is difficult to convey in a screenshot. I personally recommend using a text editor that marks indentation, such as Sublime Text. Think of indentions as designating sub-settings. “Executor”, “scenario”, “concurrency”, “ramp-up”, and “hold-for” are all settings that belong to “execution”, so they are indented underneath it. The first setting, “executor”, is preceded by a hyphen.
By the way, you may already be asking “why does it say ‘jmeter’?” Didn’t I say we’d only be using Taurus from the command line? Indeed I did!
Taurus is a tool for running other tools, and it can run some tools entirely behind the scenes, unseen to you, the user. In this case, Taurus is going to execute JMeter in the background in order to perform the API calls we’re going to tell it to execute. You will never see JMeter on-screen while running API testing with Taurus, nor will you exit the command terminal during your run. In fact, you can skip specifying the executor if you wish because Taurus defaults to JMeter when no other tool is specified.
Scenarios Section
Whereas the first “execution” section of the Taurus YAML sets up the initial, basic configuration, the following section, “scenarios”, tells Taurus exactly what steps to execute during the test. Remember in the previous screenshot that I named my scenario “configure flight-Http”, so the next section will tell us what that scenario actually does. We’ll follow this structure:
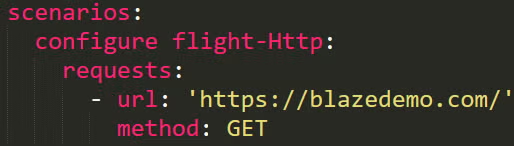
The top-level is “scenarios”, the name of our scenario follows, then the scenario’s individual requests are listed in the order to be executed. We’ll start with a simple GET to a URL, as pictured above.
Of note, there’s some shorthand you can perform once you get used to the format. If you don’t specify what type of API call you’re performing, Taurus will default to GET. That said, let’s not run before we walk and instead stick with the more detailed configuration for demonstration purposes.
And there you have it: the simple structure of a Taurus YAML script, which is an “execution” section followed by a “scenarios” section. (Note that more advanced scripts can have multiple executors, multiple scenarios, and additional types of sections, but those are well outside the scope of what we’re covering today.)
The API Test
We’re going to duplicate the test scenario depicted in the screenshots from Creating an API Functional Test, except we’ll create our test on a local machine running Taurus instead of through BlazeMeter’s web UI. Our script will mimic a user navigating the site and booking a flight, only we’ll do it via API calls instead of through a web browser.
The Taurus API test will perform the following steps, entirely via API calls:
- Navigate to the https://blazedemo.com homepage.
- Select a city for our fictional flight to depart form.
- Select our destination city.
- Select our desired airline of choice.
- Fill out a form with all of our details.
- Book the flight.
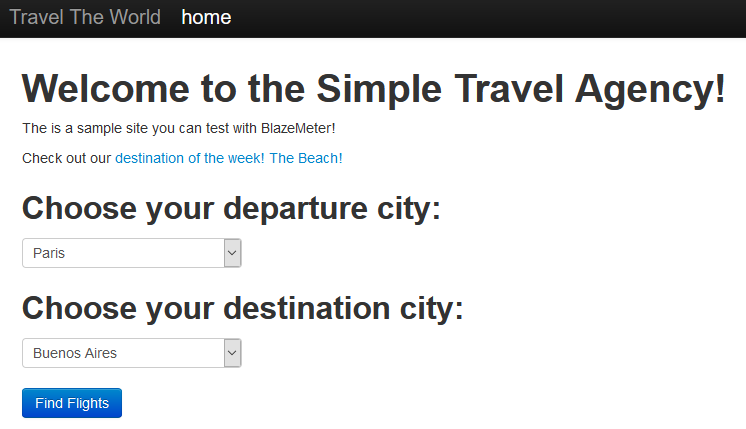
Open the Home Page
The first step is extremely simple: go to the site to begin your journey. A user would see this in their web browser:
Our strictly-command-line test, of course, won’t show this page, but will nonetheless “go” there behind the scenes.
I’m going to add additional API calls to this script as we go; therefore, I’d like to visually organize everything into transactions (named steps), so that when I dust off this script some months down the road, I won’t have to remember precisely what each step was designed to do. Since our first step simply goes to the “blazedemo” home page, we’ll name the transaction “Home”:
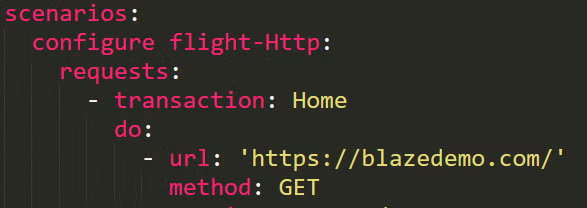
The API call now follows the “do” setting within the transaction. It’s simply some handy visual organization. Now I’ll remember that my “Home” transaction “does” a GET to the homepage. (I could safely omit the “transaction” and “do” lines, adjust indentation accordingly, and it would still work. This is all visual organization.)
Destination and Departure
Next, we’re going to select where we want our flight to depart from and, most importantly, where we’re going. The human user would do this by clicking the drop-down menus on the webpage, then clicking the “Find Flights” button:
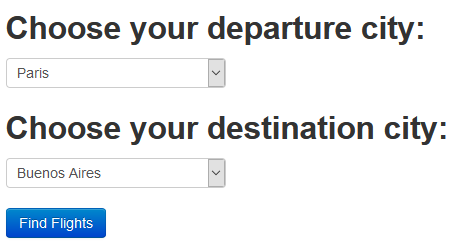
Our API test, however, is going to do it via a POST command. I’m going to name this next transaction “Depart/Dest” accordingly:
This one API call is the equivalent to using each drop-down menu, then clicking the button. For this demonstration, I decided I’m flying from Philadelphia to London (so my fictional traveler better be ready for some jet lag).
How does one know what POST command achieves this? As an API tester, you might have used your web browser’s developer tools to divulge how to perform this action via a POST command with the body specified above, sent to that “reserve.php” endpoint (or you could do what I did and cheat by using the BlazeMeter Chrome Extension to record those actions in a browser, then see the resulting POST command via the exported script.)
Choose a Flight
After our human user clicked the “Find Flight” button, they would next be taken to this page:
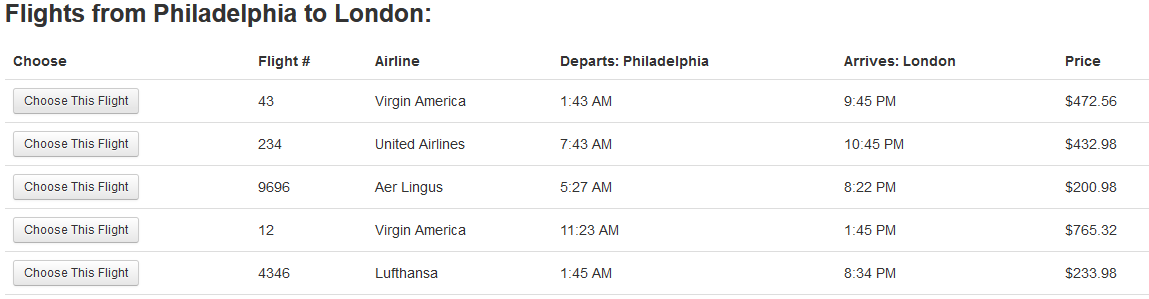
This fictional user may have then selected the first “Virgin America” option, aka Flight #43. How will our strictly-from-the-command-line API test make the same selection?
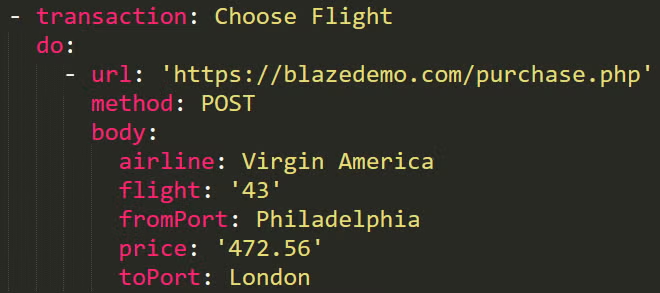
I’ll name this next transaction “Choose Flight”. This step will send a detailed message via a POST to the “purchase.php” endpoint, the equivalent of clicking the “Choose This Flight” button:
Book the Flight
The final step is to complete booking the flight by filling out a form with all of our personal information. I’m going to send it my name, address, and credit card number. (Our mock-up demo server doesn’t care too much about credit card security for our fake purchase, so in this case, sending my Visa credit card number of “12345” over plain text is ok.)
Our human user in their browser interacts with this page:
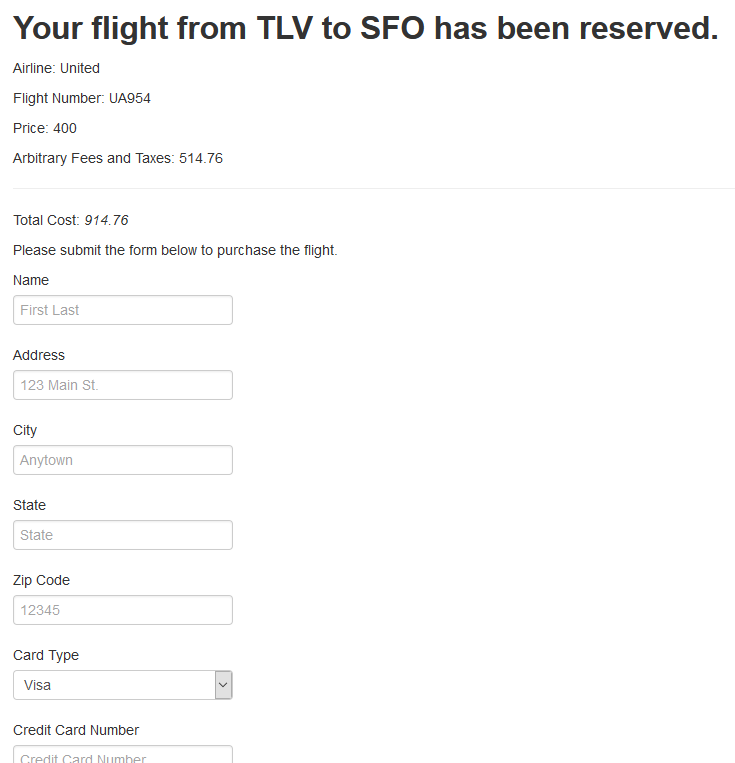
Whereas I will do the same over the API by a transaction I, unsurprisingly, named “Send Form”:
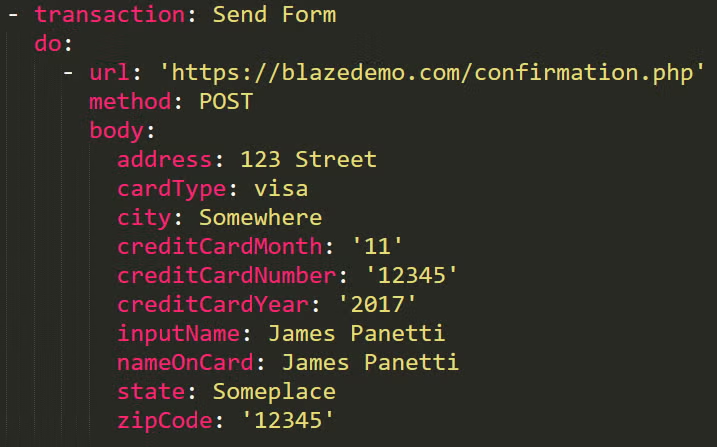
We’re done! With our final step completed, the script sends off our information to the server to seal the deal, and our traveller can start packing their bags for a London vacation (while hoping no one steals their “12345” credit card number along the way).
The Completed Script
When you string all these steps together in your YAML, you’ll quickly see why specifying transaction names is handy, at least for human eyes. Since I used screenshots of the script up to this point, here’s the full, completed script:
| execution: - executor: jmeter scenario: configure flight-Http concurrency: 20 ramp-up: 1m hold-for: 19m scenarios: configure flight-Http: requests: - transaction: Home do: - url: 'https://blazedemo.com/' method: GET - transaction: Depart/Dest force-parent-sample: false do: - url: 'https://blazedemo.com/reserve.php' method: POST body: fromPort: Philadelphia toPort: London - transaction: Choose Flight do: - url: 'https://blazedemo.com/purchase.php' method: POST body: airline: Virgin America flight: '43' fromPort: Philadelphia price: '472.56' toPort: London - transaction: Send Form do: - url: 'https://blazedemo.com/confirmation.php' method: POST body: address: 123 Street cardType: visa city: Somewhere creditCardMonth: '11' creditCardNumber: '12345' creditCardYear: '2017' inputName: James Panetti nameOnCard: James Panetti state: Someplace zipCode: '12345' |
You can see how by organizing steps into transactions, it’s easier to look back at it later and clearly see what the script is going to do (especially if the person reviewing it isn’t the person who wrote it).
By the way, if you’re experienced with API testing, you likely know that this test could perform the job in fewer steps. Going to the home page was unnecessary from an API standpoint, and we could have in fact jumped straight to issuing POST commands. I have nonetheless included them here simply to demonstrate what mimicking a real user doing the same thing might look like.
Script Execution
With our script written, execution is simple: navigate to the location of your script in your command line window, then execute the “bzt” command on it. I named my script “configure_flight.yml”, so my command is simply:
| bzt configure_flight.yml |
As your script executes, Taurus will display a live report of the test’s performance, showing you various metrics to keep you abreast of its progress:
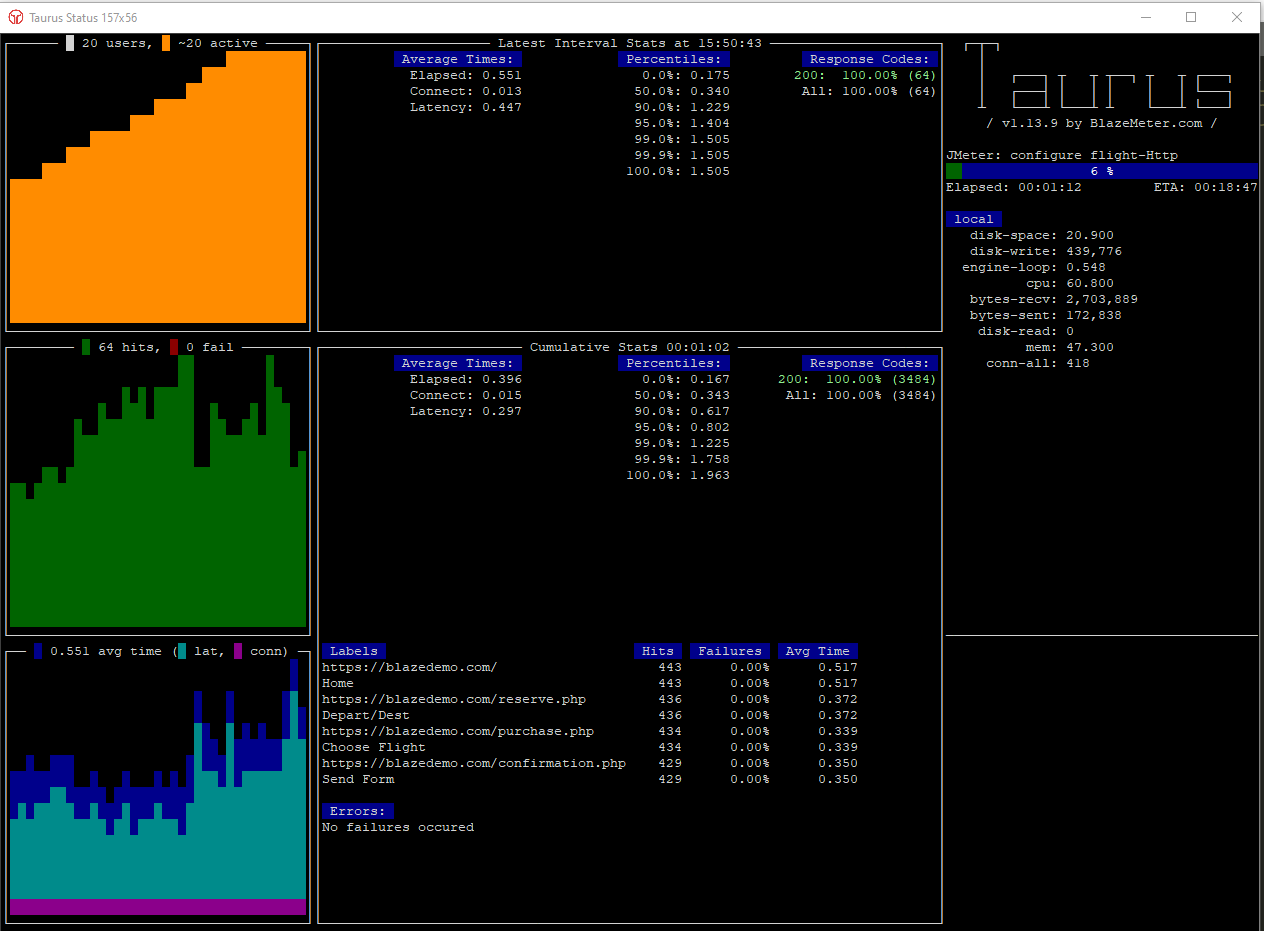
Once the test completes, the Taurus report shown above will vanish and you’ll be taken back to your terminal. To review the test results afterward, look for a new folder, named by the current date, in the location you ran the script from. That folder will contain a bzt.log and various other files that will tell you everything that happened during the test.
If you like the graphical data shown above, you can even feed the test results directly into BlazeMeter in order to generate detailed reports and graphs. Check out the reporting options detailed over on the Taurus site for more details.
The Short Version
I mentioned you can remove some notation in the YAML file and the script will run just the same. I find it’s best to include everything, as the “transaction” and “do” settings help to visually organize the script for human eyes. That said, for your reference, here’s the same script, shortened, omitting everything I previously said could be omitted:
| execution: - scenario: configure flight-Http concurrency: 20 ramp-up: 1m hold-for: 19m scenarios: configure flight-Http: requests: - url: https://blazedemo.com/ - url: https://blazedemo.com/reserve.php method: POST body: fromPort: Philadelphia toPort: London - url: https://blazedemo.com/purchase.php method: POST body: airline: Virgin America flight: '43' fromPort: Philadelphia price: '472.56' toPort: London - url: https://blazedemo.com/confirmation.php method: POST body: address: 123 Street cardType: visa city: Somewhere creditCardMonth: '11' creditCardNumber: '12345' creditCardYear: '2017' inputName: James Panetti nameOnCard: James Panetti state: Someplace zipCode: '12345' |
This script does the exact same thing as the previous version, but saves a lot of space.
Related Resources