Blog
May 20, 2020
The Boundary Extractor vs. the Regular Expression Extractor in JMeter

Open Source Automation
A relatively short time has passed since Apache JMeter™ 4.0 was released. The new JMeter introduces many useful improvements and features (check “What’s New in JMeter 4.0?” for details). In this article we will focus on the JMeter Boundary Extractor element, which is a new member of the JMeter Post Processors family.
Particularly, we will demonstrate how to use the Boundary Extractor and will compare it with the Regular Expression Extractor, which is one of the well known and very popular Post Processors. Also, don't miss the pros and cons table in the end.
Table of Contents:
- Preparation Steps
- How to Use the JMeter Boundary Extractor
- The Boundary Extractor vs the Regular Expression Extractor
- JMeter Boundary Extractor vs. Regular Expression Extractor Pros and Cons
- How to Make Your Load Testing Easier with BlazeMeter
Back to top
Preparation Steps
The service used in this current tutorial is uploaded to the github repository called Bookshelf. To run this service we need .Net Core SDK 2.1 or higher. Please download and install it from the .Net Core official website if you don’t have it already.
After cloning the project locally, open the project folder in a command line tool and run “dotnet run” to start the corresponding service. Those who are interested in more information about the dotnet cli tool can find more details here on Microsoft.
The dotnet run result should look similar to this:
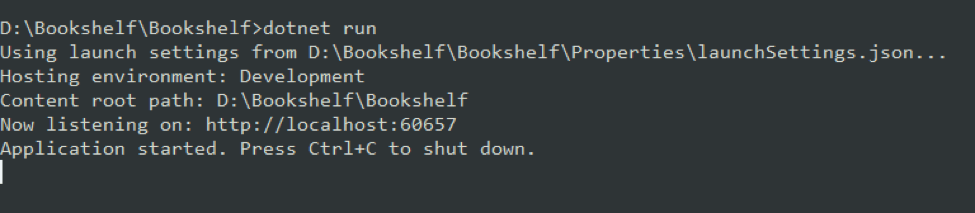
After the application has started we are ready to start testing!
Back to top
How to Use the JMeter Boundary Extractor
The JMeter Boundary Extractor is a post processing component introduced in JMeter 4.0. When learning about a new component, it makes sense to start with the official documentation.
Let’s go through all main components of the Boundary Extractor and see what it does.
According to the official documentation it extracts values from a server response using left and right boundaries. Let’s get down to the tutorial to see - what does this mean exactly?
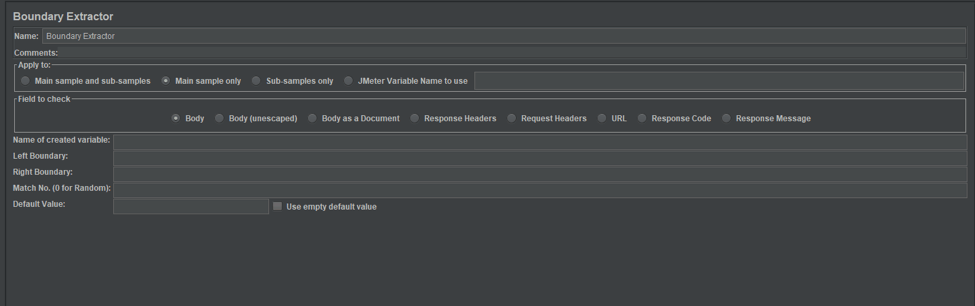
The first two sections don’t contain anything revolutionary and are the same for practically all the extractors. The first one is to set the name and description of the extractor. The second is for use in samplers that can generate sub-samples like HTTP Sampler and Mail Reader.
- The “Filed to check” section is also not a new one and is quite self explanatory. It allows you to set which part of a response should be assessed.
- “Name of created variable” indicates the key that will be used to store the parsed value into vars predefined variables. More details about vars can be found in the official documentation.
- The “Left boundary” field is unique for the Boundary Extractor. It allows you to set a left boundary value for the string being verified.
- “Right boundary” does the same as the previous field but from the right side.
- “Match No.” allows you to set an index for the found value if many values were found by the given criteria. The index starts from 1, as 0 is a reserved value.
- “Default Value” is for setting a default value for the variable if nothing was found by the given criteria.
Let’s create a project that will utilize the JMeter Boundary Extractor to parse a response. The service under the test will be the Bookshelf service mentioned in the previous paragraph.
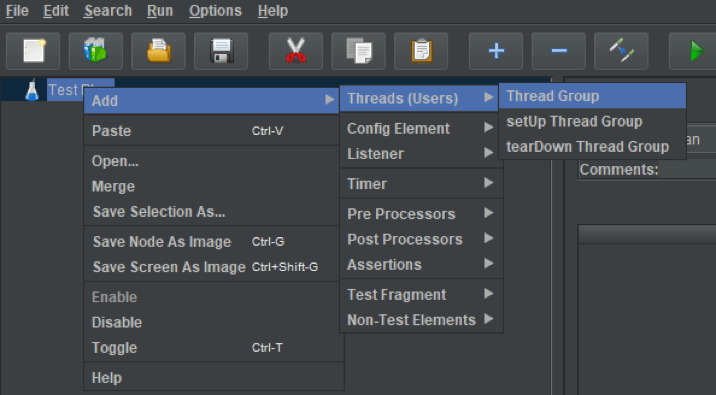
1. First, add a Thread Group.
2. Add an HTTP Request sampler to the newly created Thread Group.
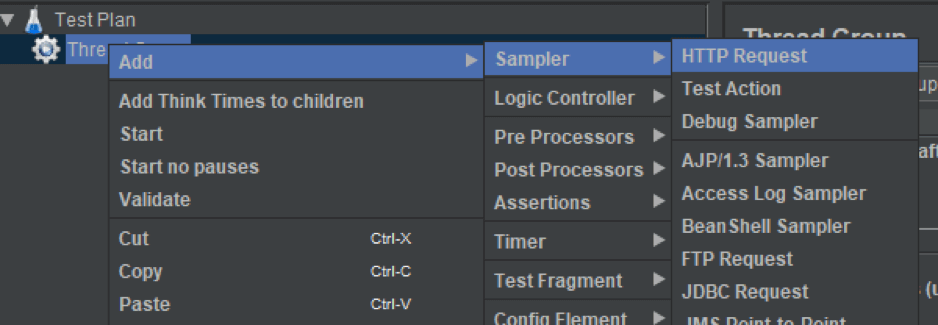
3. Configure the HTTP Request Sampler to send a request to the Bookshelf service.
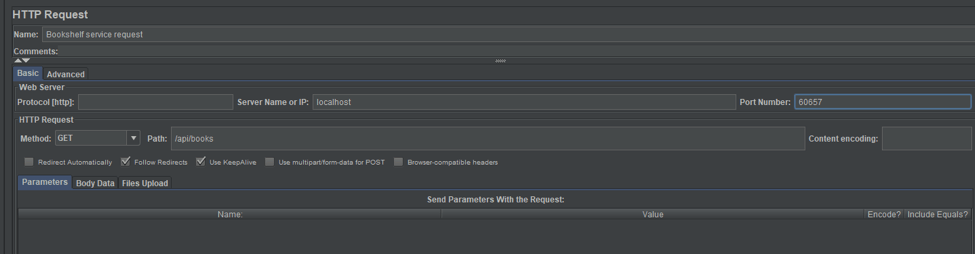
If you run the Bookshelf service from github without modification, then the HTTP Request configuration should be the following:
- Server Name or IP - localhost
- Port Number - 60657
- Path - /api/books
That should send a http request to the service we are testing.
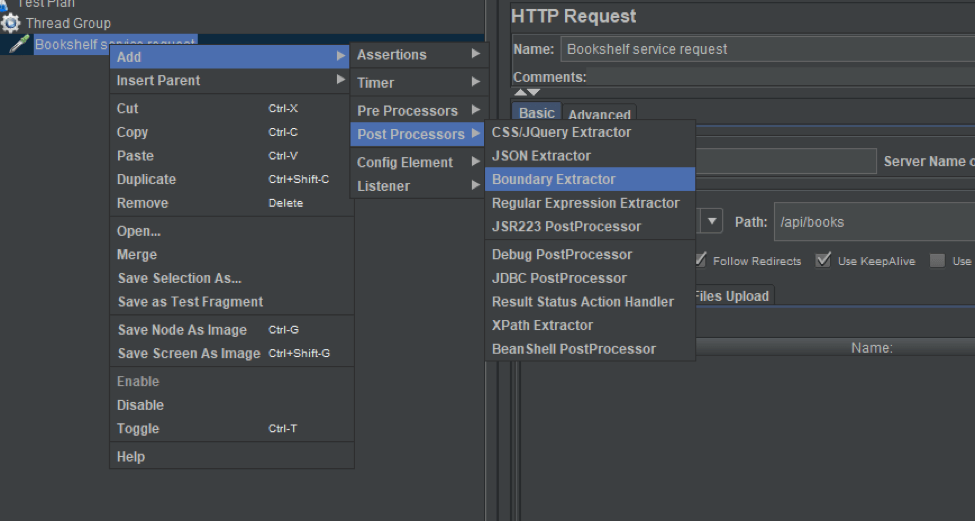
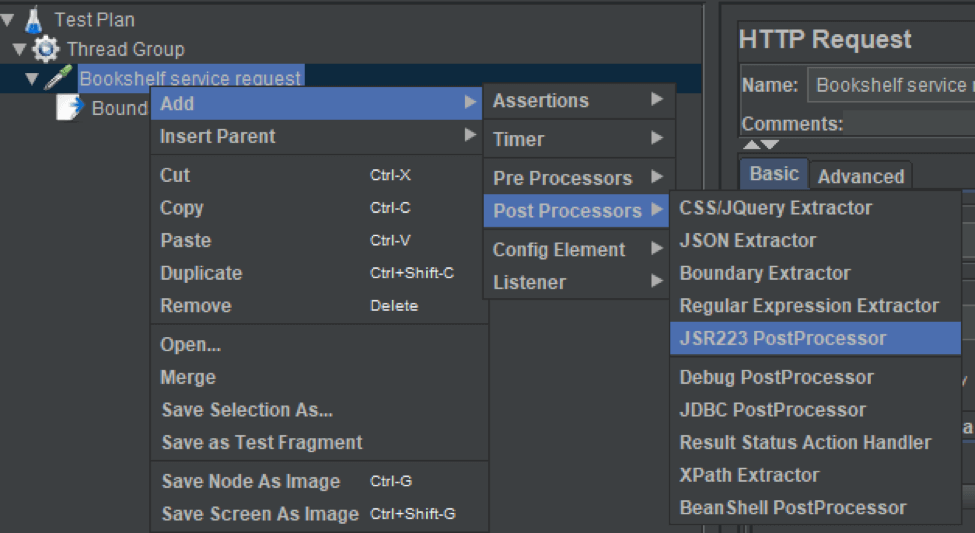
4. Add a Boundary Extractor to parse values from the service response.
5. We will now configure the component we added in the previous step to parse a book’s author out of the response. Here is the expected response from the Bookshelf service:
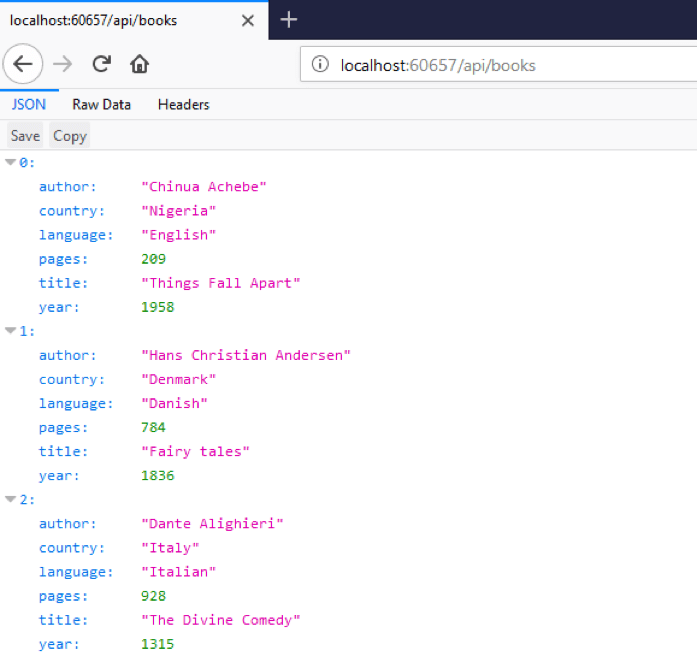
Let’s configure the extractor to parse an author’s name and store it in the author variable.
Since the expected data is surrounded by the strings ‘author:”’ from the left and ‘”’ from right, we should put these values as left and right boundaries in the boundary extractor configuration.
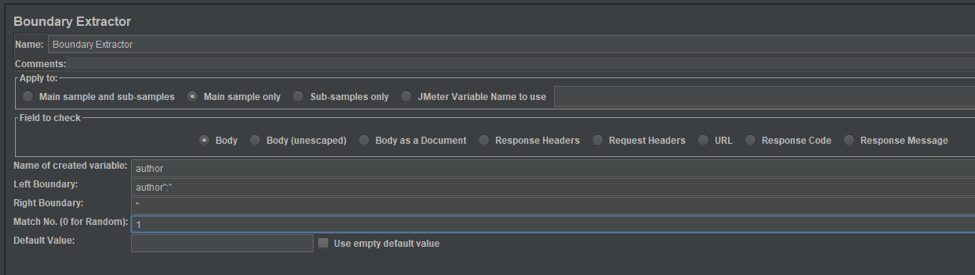
Here we’ve also added a variable name and match index, so that we can easily access the first parsed value later.
6. Let’s make sure that we have actually parsed something out of the response. Let’s retrieve the “author” variable and log in the log viewer panel.
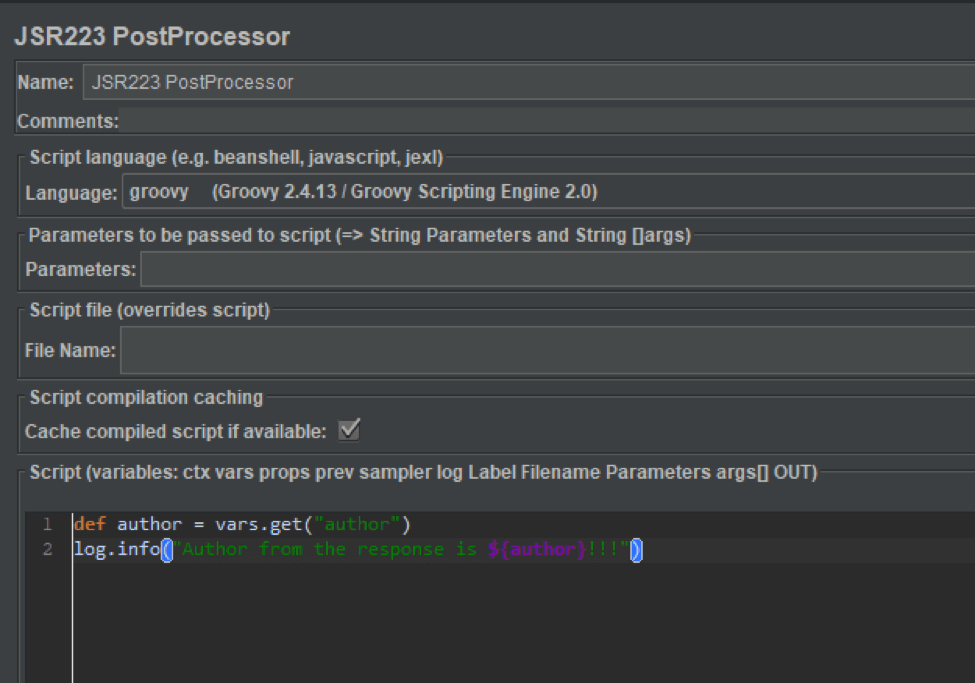
To do that, add the JSR223 PostProcessor.
And add the following script into the script section:
def author = vars.get("author")
log.info("Author from the response is ${author}!!!")
After that, the JSR223 PostProcessor should look like in the screenshot below:
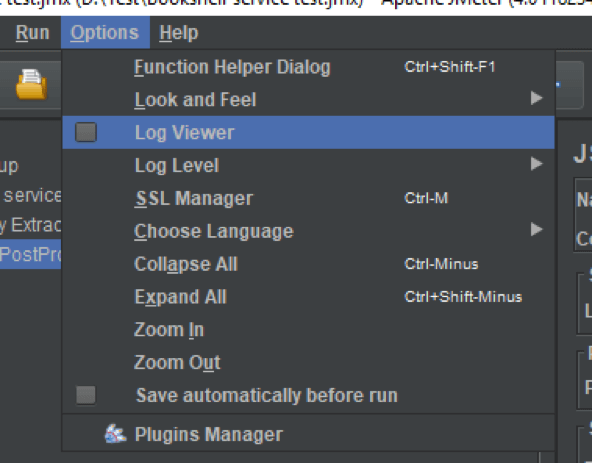
7. Let’s run the test and make sure that the author variable is not empty. Open the log viewer by pressing Option => Log Viewer menu item.
8. Run the test and make sure that there is an author name in the logs.

Let’s sum up what was done in this section. We’ve built a test project that uses the Boundary Extractor to parse a response from a service. What could be confusing is that JMeter already has plenty of components that allow you to fetch a data from a response.
In the next section we are going to compare the Boundary Extractor with the arguably most powerful value extractor components - the Regular Expression Extractor.
Back to top
The Boundary Extractor vs the Regular Expression Extractor
This section is by no means a full and comprehensive description of Regular Expression Extractor. There is another article that is dedicated to the Regular Expression Extractor itself.
This section is only a comparison between the Boundary Extractor and the Regular Expression Extractor. To start out the comparison, let’s see how the Regular Expression Extractor performs within the same scenario as before. Then, we will compare the source code, KPIs and finish off with a list of pros and cons for each one.
Running the Regular Expression Extractor
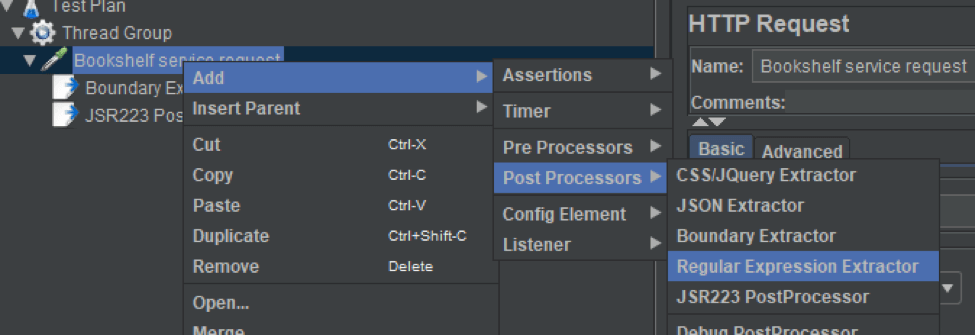
1. Let’s add a Regular Expression Extractor to the project we created earlier.
2. The fully configured Regular Expression Extractor for this test, which is configured to run the same scenario we ran with the Boundary Extractor, should look like in the screenshot below.
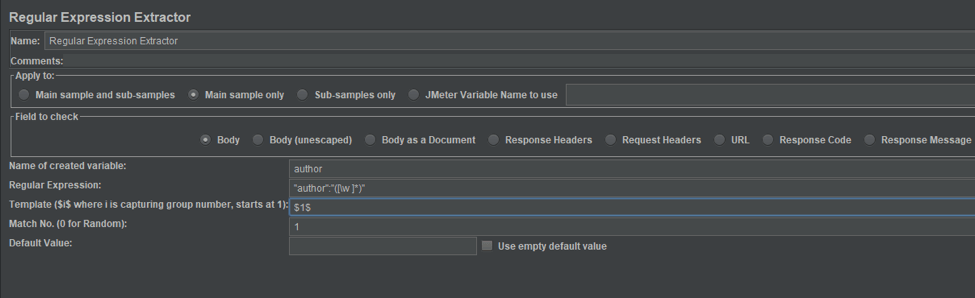
As promised earlier, we won’t go into details about how any of these values operate. The only thing worth mentioning here is that the result will be parsed with the regular expression "author":"([\w ]*)" and the result will be stored into the author variable as it was before.
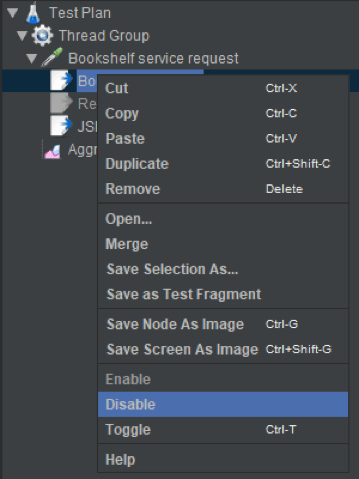
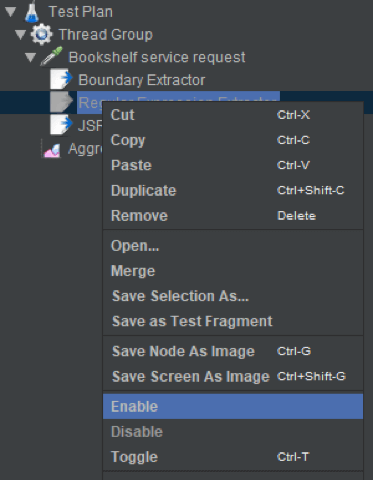
Let’s disable the Boundary Extractor component temporarily and make sure that the regular expression extractor works as it was intended.
After running the test the log window should contain an author name fetched from the response.

As we found out, the Boundary Extractor and Regular Expression Extractor can solve the same problems. What are their differences then?
Let’s dig deeper to find the answer. How deep? To the source code!
Comparing the Source Code of the Boundary and Regular Expression Extractors
JMeter is an open source project, so it is possible to download the source code and look inside the extractors we are comparing. Here, the code from JMeter project’s github mirror was used. So, let’s look inside.
The working horse of the Boundary Extractor is the String.indexOf method. The Regular Expression Extractor on the other hand utilizes a Perl5Matcher class. It is easy to find in the net multiple researches indicating that String.indexOf is much faster than regular expressions. On the other hand, indexOf does not support a searching by pattern. If a test requires searching with a complex pattern, the Regular Expression Extractor would be the component of choice.
Comparing the KPIs of the Boundary Extractor and the Regular Expression Extractor
Before moving on we can actually try to perform a rough comparison of the Boundary and Regular Expression Extractors. JMeter has an Aggregate Report component that provides various test metrics such as minimum processing time, average time and so on. Let’s use it to measure a difference between the tested components.
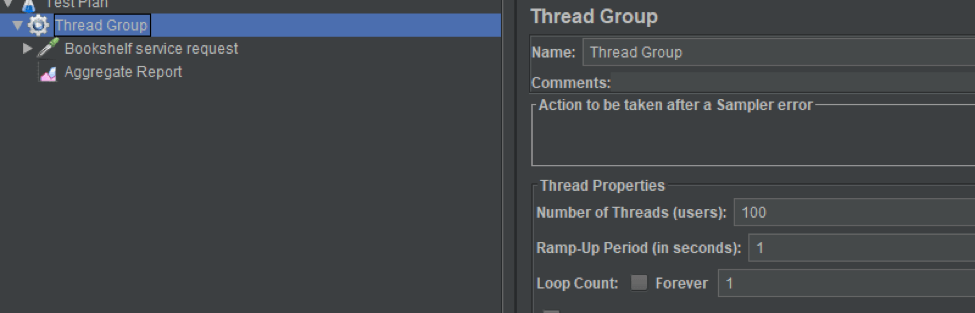
Add an Aggregate Report component to the test Thread Group.
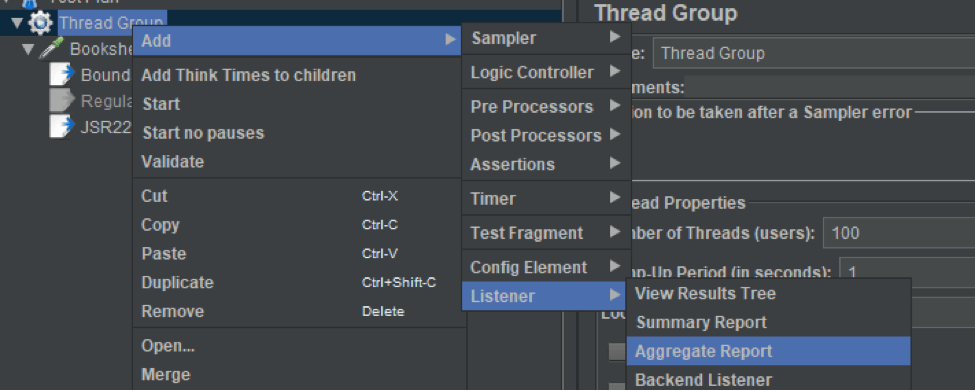
Set the number of users to 100, to send multiple parallel requests to the service the same time.
Disable the Boundary Extractor from the test project and enable the Regular Expression Extractor.
Take a look to the aggregate report component. In my system the numbers are more or less close to what is in the screenshot below.

Now, enable the Boundary Extractor and disable the Regular Expression Extractor.
Clear the aggregate report window, run the test and check the report. Now the picture is a bit different.

Though the used comparison technique is not fully precise, multiple run cycles showed that theBoundary Extractor is faster than Regular Expression Extractor.
So, if to put what was said above into a pros/cons list, we would have the following picture:
Back to top
JMeter Boundary Extractor vs. Regular Expression Extractor Pros and Cons
Back to top
Boundary Extractor | Back to top
Regular Expression Extractor | |
Back to top
Pros | Simplicity - Writing left and right boundaries is simpler than complex regexps. | Supports a search with regular expressions. |
| Performance - Java methods used in the Boundary Extractor are much faster. | Battle tested, well known and well documented. | |
Back to top
Cons | Does not support complex search patterns. | Slower than the Boundary Extractor. |
| Could be an overkill when a search is relatively simple (like parsing an XML value from node). |
To learn more advanced JMeter, go to our free BlazeMeter University.
Back to top
How to Make Your Load Testing Easier with BlazeMeter
If your load tests include extracting and you need to scale them, or if you want to share your test results with managers, you might want to consider running your test in BlazeMeter.
After creating your JMX file, upload it to BlazeMeter and run your tests. With BlazeMeter, you will be able to collaborate on your tests and reports with team members and managers, scale to more users from more geo-locations, and get advanced reports.
Back to top
Summary
This blog post has demonstrated a work of the JMeter Boundary Extractor, a new post processing component introduced in JMeter 4.0. Also a basic comparison of JMeter Boundary Extractor with Regular Expression Extractor was performed.
I hope this will be helpful next time that you’re wondering which extractor to choose for parsing test results.
Related Resources