Blog
April 6, 2023
Gatling via Taurus: The Beginner-Friendly Load Testing Gatling Alternative

Performance Testing
What is Gatling?
Gatling is a free, open-source load and performance testing tool that is extremely popular among the professional testing community. It is an especially powerful tool in the hands of an advanced user because of the nearly unlimited range of test customization it offers, granted by the user’s ability to code their own tests.
The downside, however, is it’s not known for being beginner-friendly. In order to write a test script for Gatling, you must have expertise in Scala, a high-level programming language (or, alternatively, Java or Kotlin). Also, unlike some other tools (such as JMeter), Gatling is strictly used from a command line terminal. It has no GUI. This is great if you’re a veteran tester with some dev experience whose natural habitat is within a command terminal, but it can be particularly daunting for the rest of us.
This is where Taurus and BlazeMeter come to the rescue, offering both a simpler, beginner-friendly approach to writing and executing Gatling tests and a means of scaling Gatling load testing capabilities far beyond what it can achieve on its own.
Back to top
What is Taurus?
Taurus is an automation framework compatible with a vast variety of testing tools, and like Gatling, it is free, open-source, and run from a command line terminal.
Taurus’s automation superpowers make testing with Gatling much easier to learn. In fact, with Taurus, you can execute a Gatling test without any coding knowledge whatsoever. All you need to write is a YAML script (a file with a “.yml” extension), which, as I’m about to demonstrate, is very easy to learn on the fly. Taurus will then do the rest, going so far as to automate writing a Scala script for you.
Taurus does a lot more than make Gatling beginner-friendly, though. It adds the ability to generate test reports and it can scale tests up to a level that Gatling cannot do alone, greatly enhancing its ability to execute load tests.
Back to topHow to Write a Gatling Load Testing YAML Script
To demonstrate how easy it is to run a Gatling test through Taurus, I’ll write an actual test. I whipped up the following YAML script as a demo. Let’s step through it line by line (and feel free to copy it and run it yourself).
Note: I’m taking the long way around and writing my own script, but you don’t have to! You can use Blazemeter’s Chrome Extension or Proxy Recorder to record the actions you want scripted, then the recorder can automatically write a Taurus script for you. Though neither recorder automatically configures the generated Taurus script for Gatling, you can easily tweak the script yourself. Simply use the below sample script as a reference and adjust the executor so that Taurus will use Gatling.

My script consists of two main sections: execution and scenarios.
The execution section first tells Taurus which tool (executor) we’re going to use (in this case, Gatling).

Taurus will either use your existing Gatling installation or download and install Gatling itself automatically, saving you the effort of learning how to do so yourself.
The remaining execution settings describe my intended load: iterations specifies how many times the test scenario will execute, concurrency determines how many virtual users will execute simultaneously, ramp-up denotes how long it should take to reach said concurrency, and hold-for is your delay (“think”) time between each step of the test.
(You likely noticed my load of two users for ten seconds makes for a pitifully weak load test. This writer’s desktop is no performance testing behemoth, but it would be a simple matter to adjust these numbers to simulate a real, high-load scenario).
The final line names my test scenario, which I creatively call “demo”.
The scenarios section follows, which is where you fine-tune your test, step by step. I only have one test scenario in my script (the aforementioned “demo”), so its name appears as the first setting, denoting that all settings that follow belong to it.

Next, default-address sets the root URL we’re working with, which I set to our ever-popular blazedemo.com. This tells Taurus that all URL paths that follow will append to this root address. This is a purely optional setting, but without it, you would have to specify the full path, including “blazedemo.com/” in every page-specific URL that follows, which can quickly become tiresome.
Now begins the script proper. I want to walk through selecting and purchasing a flight, which requires my script to send several HTTP requests, each denoted by a respective url setting. Here’s the first one:

Follow along in your web browser to see how these steps correlate. The first step is simply to go to the homepage, which is already configured as the default-address, thus there’s nothing to append. A simple “/” will therefore suffice.
There’s nothing fancy here. We’re just going to the site to begin our journey, so all I need to do is verify the homepage loads as expected. I know that page contains within its body the text “city”, so let’s look for that by employing the assert setting.
I want to check the page’s body, so I set that as my subject setting. The easiest way to check for “city” is via a regular expression, so I feed the contains setting my regex, “ .+city.+” (sans quotes). Finally, I add the setting regexp and set it to “true” so that Taurus knows to interpret the string as a regex.
If you’re following along in your browser, you’ll note that once the page loads, we’re presented with a choice of “departure city” and “destination city."

Once you make your selection and click “Find Flights”, the next page to load will belong to the URL path “/reserve.php”, where you’ll be prompted to select a flight.

Click “Choose This Flight” and you’ll find yourself taken to “/purchase.php."

(Ignore that the page incorrectly says “TLV to SFO”. This is not a real production site with real flights, so text may not always be exactly precise.)
Let’s next simulate doing this in our Gatling test. We can actually merge these two steps into one by sending our departure, destination, and flight information straight to “/purchase.php” via a POST method, skipping “/reserve.php” altogether.
(Worth noting: we would not want to skip a page were we testing the UI, such as via Selenium. In this case, we’re testing the backend without regard for the UI, so combining these steps suits our purpose).

My next url setting appends “/purchase.php” to “blazedemo.com” (our default-address) to build the URL. I have data to send this time, so I set the method to “POST”. (Did you notice I omitted method in the previous request? That’s because if you don’t specify a method, Taurus will assume the request uses a “GET” method by default).
Next, I need to build the request’s message body. The body setting therefore includes a handful of variables: the departure (fromPort) and destination (toPort) cities and the flight-specific information (airline, flight, and price).
(If you’re wondering how I identified these fields, I simply looked under the hood at the site’s HTML code via my web browser’s built-in development tools.)
Let’s ensure the request succeeds before moving on. Add another assert. This time we need to know that the site responded to the data we sent it with a HTTP response code of 200 (“OK”), so I set contains to “200” and subject to “http-code”.

Now that we’ve chosen a flight, it’s time to seal the fake deal with a pretend purchase. In your browser, you’ll notice that the next step from “/purchase.php” is to fill out a fake form, followed by a click of the “Purchase Flight” button.
Doing so takes you to the final page, “/confirmation.php”.

This means we need one last “POST” method to ensure our script mimics this behavior.

A peek behind the scenes reveals that the purchase form fields include inputName, address, city, state, zipcode, and some credit card related fields. Add those to the request’s body, along with whatever fake value you want to assign them, then add a final assertion to ensure we get a 200 “OK” code in response. Voila! You have fake-purchased your fake flight with Gatling, and without ever actually installing Gatling yourself, much less touching a Scala script!
(A side note: My little demo script here is very simple, but in reality, you can create far more complex scripts using the various options available for the Gatling Executor).
Back to topRunning the Test
With our YAML script complete, executing the test via the command line is simple (even if you’re not used to spending most of your time in a command terminal). Simply enter the command bzt (BlaZemeter Taurus) followed by the path to your newly written YAML script.
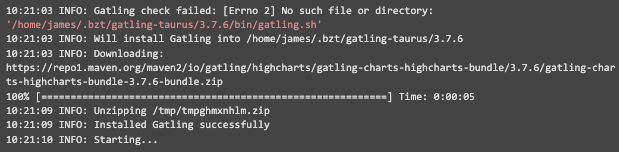
I don’t have Gatling installed in my Linux environment, so when I start the test, Taurus automatically downloads and installs it.
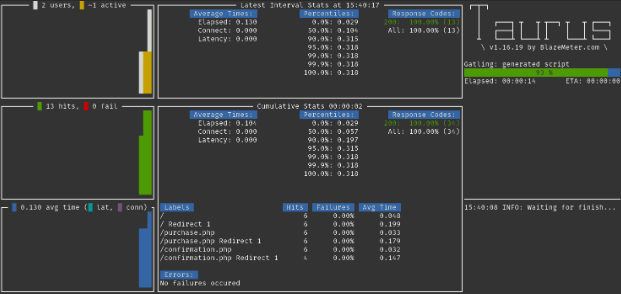
As the Gatling test executes, Taurus conveniently displays a live, visual report within my command line terminal.
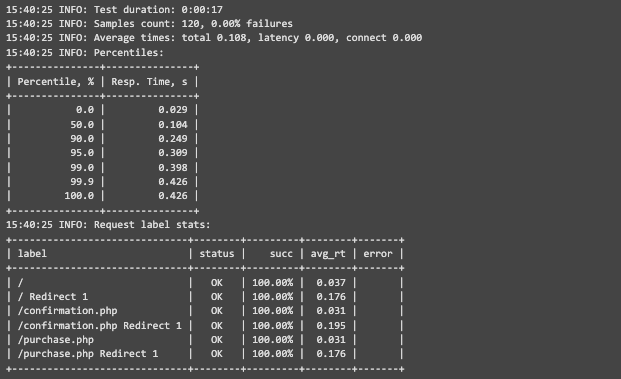
The test completes and reports successful results.
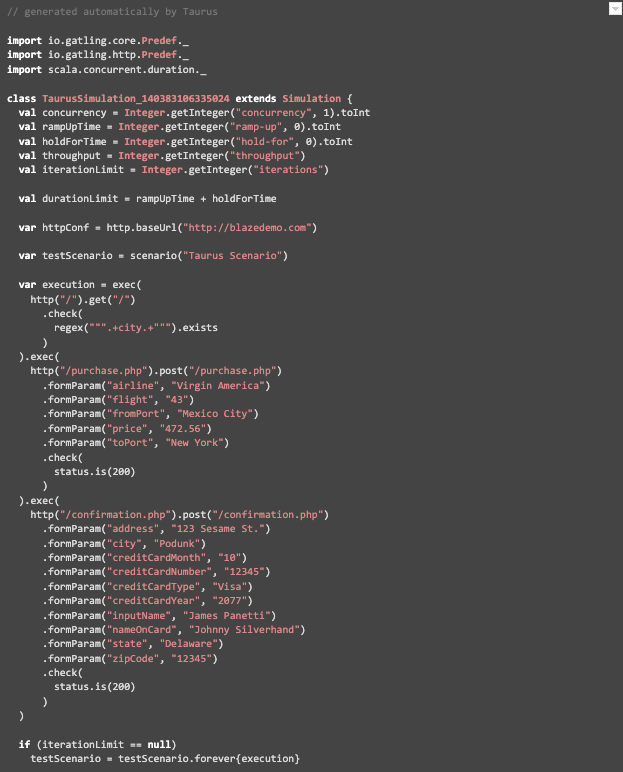
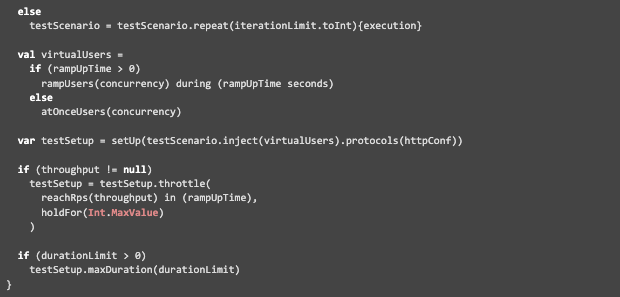
It is truly that simple. Taurus generates a number of useful artifacts after the run, including Gatling’s own simulation.log and a Scala script Taurus automatically generated in order to run Gatling behind the scenes.
 Back to top
Blazemeter Takes Load Testing to the Cloud as a Gatling Alternative
Running a load test from a local machine restricts you to your hardware’s available resources, but BlazeMeter lets you scale your test up exponentially, granting you access to testing engines around the globe. Blazemeter’s performance testing platform is built atop a Taurus foundation, so importing our Taurus Gatling test is incredibly easy.
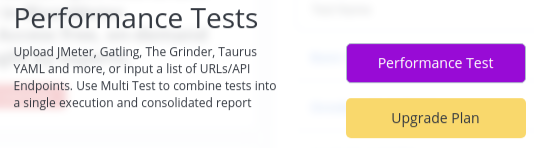
First, create a Performance Test:
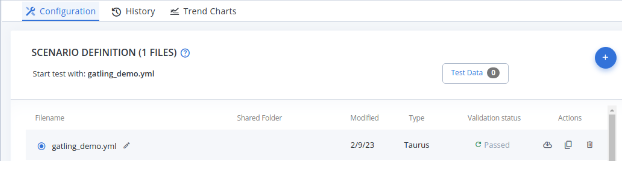
Upload the YML script to this new test’s Scenario Definition:
And that’s it – You took your Gatling test to the cloud in two steps. BlazeMeter already knows what to do from reading the YAML script, as seen when you start the test. Alternatively, you can further modify your YAML script to configure BlazeMeter-specific settings, such as how many test engines to run from which global locations. Check out the Taurus documentation on Cloud Provisioning for a wealth of information on the topic.
Now let’s start the test.
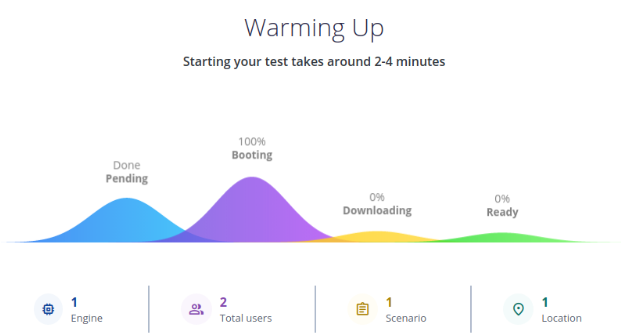
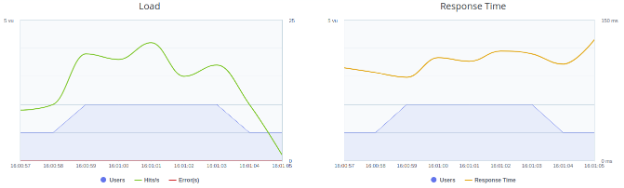
A live report will appear throughout the test run, displaying final results after it completes.
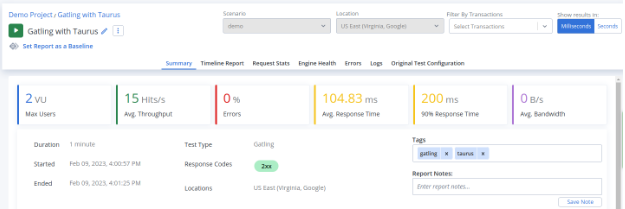
Whereas Taurus adds a reporting capability to Gatling, BlazeMeter further enhances it with a web GUI and in-depth, real-time visual reports. You can then compare your report against previous test runs and even share it with your colleagues, regardless of said colleagues’ level of technical expertise.
There’s a lot more you can do with Taurus and BlazeMeter. BlazeMeter’s documentation on Creating a Taurus Test is a great place to start.
To learn more about Gatling, especially with regard to how it compares to JMeter, start with my colleague’s recent post, Gatling vs. JMeter: The Ultimate Comparison.
Back to topBottom Line
As you can see, using BlazeMeter with Taurus helps create incredibly user-friendly performance tests for both writing and executing tests with Gatling load testing. While traditionally using Gatling has needed a prerequisite of expertise in other high-level programming languages such as Scala, the above example shows how to bypass that prerequisite to take full advantage of Gatling load testing for those that aren't expert testers with dev experience.
See how BlazeMeter can help ease the difficult parts of testing you are experiencing and enhance your testing strategy with robust performance testing.