Blog
March 11, 2020

BlazeMeter Labs has just released a new version of the JMeter HLS plugin. This release adds support for the MPEG-DASH protocol, changes sampler names and implements automatic protocol recognition and other details to easily create scripts and test your video streaming services with Apache JMeter™.
As you may know, the Streaming Plugin allows you to easily test the performance of your on-demand or live streaming video servers when exposed to different types of loads.
Throughout this post, we will be covering the improvements made to the plugin as well as explain some concepts regarding MPEG-DASH protocol.
Back to topHLS Plugin 3.0: Key Features
MPEG-DASH
MPEG-DASH (DASH) is a dynamic video streaming protocol used for live streaming or on-demand videos. It stands for “Moving Picture Experts Group - Dynamic Adaptive Streaming over HTTP.” As the name implies, it adapts dynamically to the network conditions.
How Does MPEG-DASH Work?
DASH is an adaptive protocol that generates small fragments of audio and video called “Segments”, with different variations (resolution, encoding, etc) which allows the protocol to choose which combination of segments assure the best user experience based on the actual bandwidth and resolution. All the segments are described by a file called “Manifest”, which also contains information such as segment location, multi-language audio and video coding information.
To better understand potential segment changes, let's give an example:
Let's imagine that we are watching a movie on Netflix and, at a given point in time, another user starts to use the same network, which causes your available bandwidth to drastically go down. DASH, in order to allow you to keep seeing the movie without “waiting” for it to load, automatically changes to other segments, with a lower resolution, that can be downloaded with your current available bandwidth.
Now that you have a general idea of how MPED-DASH works, lets dive into generating a test script, using JMeter, to test your Video Streaming service.
Back to topHow to Create a Script For the HLS Plugin
Here's how to create a JMeter script for the HLS plugin.
Get the Plugin
If you don’t have the Plugins Manager already installed, read the article, “How to Install the JMeter Plugins Manager.” After that, open it up. (Options → Plugins Manager)
Next, you'll:
- Select the Available Plugins and in the search field, write HLS and select the HLS Sampler plugin checkbox.
- Click the button Apply Changes and Restart JMeter.
Set up the Test
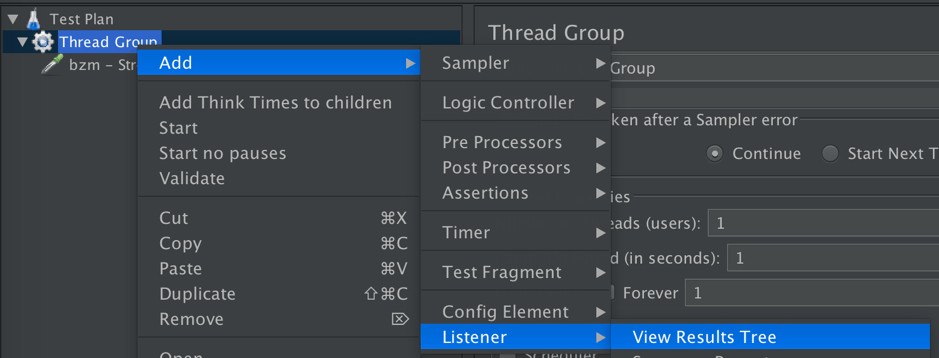
You can add a Streaming Sampler element by right-clicking on the Test Plan’s Thread Group element to get the Add menu: (Test plan → Add → Thread Group → Add → Sampler → bzm - Streaming Sampler).
Since the new version of the plugin does not only support HLS but also MPEG-DASH, it includes a functionality that will recognize the protocol you want to test only by providing the URL, without needing to select anything in the interface, making the configuration easy and fast!
Additionally, the Sampler name has been changed from “HLS Sampler” to “Streaming Sampler” to reflect the multi-protocol support.
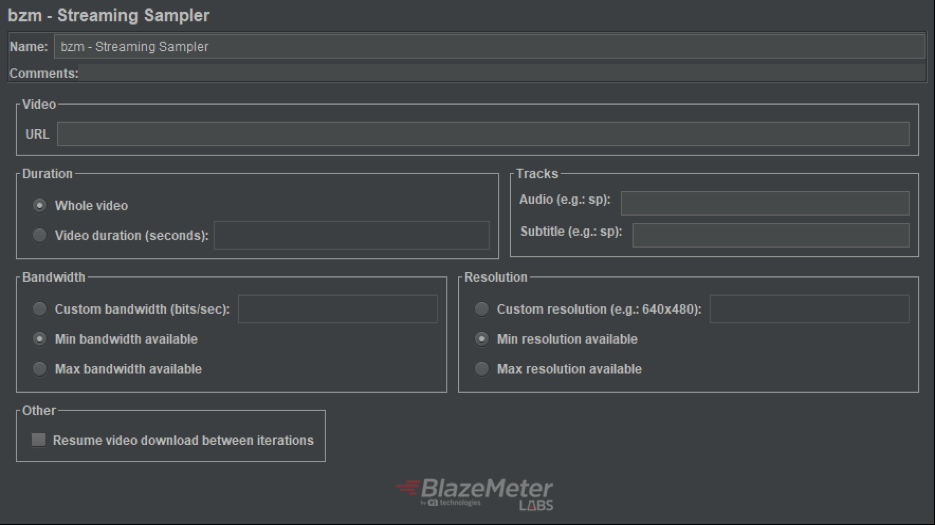
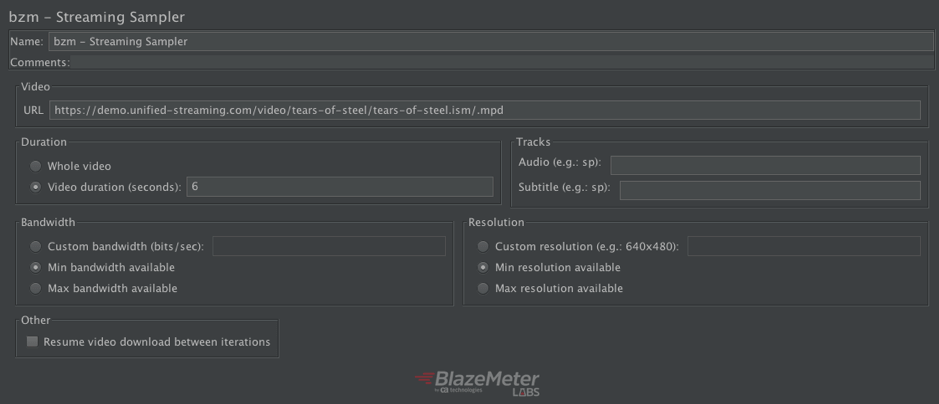
Set the Video Up
In the URL field, you should set the URL of the DASH video Manifest (.mpd), which contains the information regarding all the potential tracks, variants and general information and associated content to reproduce the video.

Duration
In this section, you can set the amount of time you want to download from the video. The duration can be "Whole video" or a custom duration in seconds. Keep in mind that if you choose the "Whole video" option for a live streaming video, then the test plan will never end unless the streaming ends or you stop the test manually.
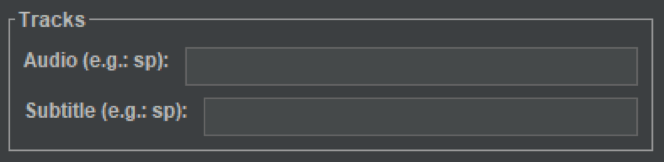
Tracks
Select the language of subtitles and/or audio you want to use in the test. If left empty, the default ones will be used.

Note that you must enter the language code in the exact same format found in the manifest, since it’s sensitive to capital letters and full words. For example, “Eng” won’t be picked if English appears as “en” in the manifest.
Languages
You can run the test without selecting any language, check in the manifest in the response bode of the result, and after that, run the test with the language you choose.
Bandwidth and Resolution
Select Bandwidth and Resolution based on what you want to test. The options can be Min, Max or a Custom value.
The bandwidth is considered more important (treated with higher priority) than resolution selection, because the main feature of DASH is that it changes the segments based on the available bandwidth at a certain moment of the download time, thus providing the best possible user experience.
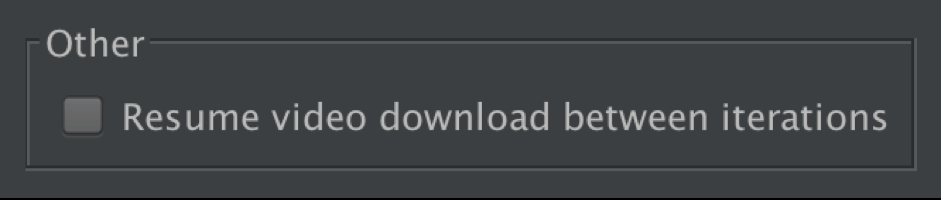
Resuming Download
Check resume video download between iterations in case you want the plugin to download from where it left off in the last iteration.

For a better understanding of this point, let's say we set a video duration to 5 seconds in the sampler. If we check the resume video download between iterations option and play start, the first iteration will download until it reaches the 5th second, the following iteration will start from that point (second 5) until it reaches 10 seconds, and it will keep doing so until all the iterations end or the video ends.
If you don’t check the option, it will repeat downloading from 0 to 5 seconds in each iteration.
View Results
To be able to see the results after each download, Add a View Results Tree to the Thread Group
With this, you will be able to see how the server is behaving in real-time during the test execution.
And now your script is ready to run!
Let's take a look in the following paragraphs to see a working example.
To begin with, the manifest that we will use is at this URL: https://demo.unified-streaming.com/video/tears-of-steel/tears-of-steel.ism/.mpd
For this test, we will use a Custom Video duration of 5 seconds, with both bandwidth and resolution at minimum, and default values for subtitle and audio. With those configurations, the sampler should look like the following image:
After this, we can press start to run the test and see what we get.
The plugin will start downloading, from the provided URL, the manifest and the segments according to the provided configuration. As it is right now, the result tree would look like this:
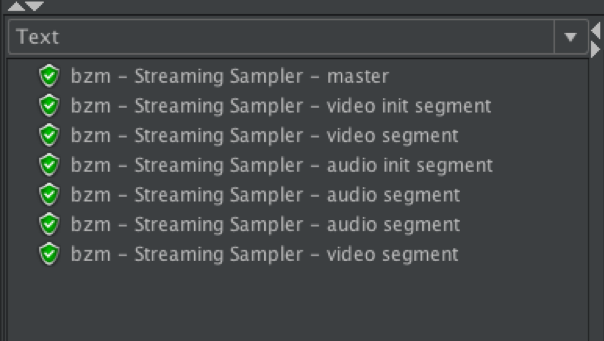
In case you want to check the downloaded manifest, simply click “bzm - Streaming Sampler - master” > Response Data > Response Body. The resulting text should be something like this:
<?xml version="1.0" encoding="utf-8"?>

type="static" mediaPresentationDuration="PT12M13.936333S" maxSegmentDuration="PT5S" minBufferTime="PT10S" profiles="urn:mpeg:dash:profile:isoff-live:2011,urn:com:dashif:dash264">
 id="1" duration="PT12M13.936333S">
 dash/
  id="1" group="1" contentType="audio" lang="en" minBandwidth="64008"
  maxBandwidth="128002" segmentAlignment="true" audioSamplingRate="48000"
  mimeType="audio/mp4" codecs="mp4a.40.2" startWithSAP="1">
  schemeIdUri= "urn:mpeg:dash:23003:3:audio_channel_configuration:2011" value="2">

  schemeIdUri="urn:mpeg:dash:role:2011" value="main" />
  timescale="48000" initialization="tears-of-steel-$RepresentationID$.dash"
   media="tears-of-steel-$RepresentationID$-$Time$.dash">

     t="0" d="190464" />  d="191488" />  d="192512" />  d="191488" />


   id="audio_eng=64008" bandwidth="64008">
   id="audio_eng=128002" bandwidth="128002">

    id="2" group="2" contentType="video" lang="en" par="56:25"
    minBandwidth="401000" maxBandwidth="2200000" maxWidth="1680"
    maxHeight="750" segmentAlignment="true" sar="1:1" frameRate="24"
    mimeType="video/mp4" startWithSAP="1">
     schemeIdUri="urn:mpeg:dash:role:2011" value="main" />
     timescale="600" initialization="tears-of-steel-$RepresentationID$.dash"
       media="tears-of-steel-$RepresentationID$-$Time$.dash">
         t="0" d="2400" r="182" />  d="1200" />

     id="video_eng=401000" bandwidth="401000" width="224" height="100"
     codecs="avc1.42C00D" scanType="progressive">
     id="video_eng=751000" bandwidth="751000" width="448" height="200"
     codecs="avc1.42C016" scanType="progressive">
And there you go!
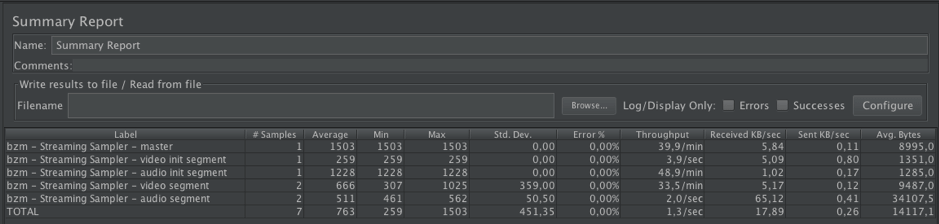
You’ve consumed video from your video streaming service. But, if you wanted to load the service with multiple iterations and put it under pressure, you would need a way to get general statistics on all generated requests for a proper analysis. The plugin also provides a good aggregation of requests to easily monitor KPIs per request type. For that, just add a Summary Report listener and to avoid unnecessary resource consumption, disable the previously added View Results Tree listener.
Running the test, you should now see something like this in the Summary Report listener:
When you finish creating your JMeter script to test your DASH videos, you can upload it to BlazeMeter and enhance your testing abilities with better reporting, collaboration and scalability.
The platform also allows you to generate traffic from all over the world, testing the performance of your server for users worldwide. In case you want to measure additional metrics, like segment buffering time, check our previous post on version 3.0’s features where we explain how to do that. And that’s it!
This is just a part of the changes that BlazeMeter Labs has prepared for you. Don’t simply read about them though, try them for yourself!