Blog
November 29, 2020

In this blog post you will be taken through a step-by-step guide describing the process of creating a comprehensive framework for testing RESTful APIs with a Spring Cloud Feign Client.
Spring Feign doesn’t stand alone but rather works closely with other Spring Framework components like Spring Web and Spring IoC container. To understand Feign we need to have a closer look at these latter two components.
Back to topWhat is a Spring Cloud Feign Client?
Spring Cloud Feign is a convenient way to test your application’s API, focused on creating tests to verify business logic instead of spending time on the technical implementation of web services clients.
You only need to describe how to reach the remote API service by providing details such as the URL, request and response body, accepted headers, etc. The Feign Client will take care of the implementation details.
Back to topWhat is Spring IoC and How Does it Interact with Feign for Rest API Testing?
Spring IoC implements the dependency injection principle when all the object dependencies are loaded (injected) by another object. This means that for any object, you only need to define all the objects it depends on, without taking care of the initialization details. This is why it’s called inversion of control (IoC). This approach makes your code more flexible and independent of the implementation of the objects it depends on.
In Spring, the object that injects dependencies is called a Spring container. The container implements the ApplicationContext interface (which itself extends the BeanFactory interface by adding more enterprise-specific functionalities) and is responsible for installing, configuring, and assembling beans in the application. ApplicationContext itself is a central interface to provide configuration for an application. It has many features, but within this blog post we will need only bean factory methods to access application context and methods to load file resources.
Spring Feign uses ApplicationContext to create an ensemble of components to send requests to a remote service endpoint described by the Feign Client specification. In this blog we will use ApplicationContext to create beans of Feign Clients and also to create beans of almost all types within the test framework. To read more about Spring IoC refer to the documentation.
We will use Spring Web components that access resources, like the @RequestMapping annotation, to describe API interfaces.
Back to topTest a Spring Cloud Feign client with the industry's most-trusted performance testing platform. Start testing with BlazeMeter for FREE today!
How to Get Started With Feign Clients
Feign Clients use instruments from the Spring Web package to describe remote services endpoints. Later, in this blog, I will show you how to use those instruments to create a REST service client.
So, to build up the framework we will use the following libraries and technologies:
- Java 1.8 or higher. Download Java.
- Spring Boot. You may notice that I didn’t previously use the term ‘Spring Boot’, but only used Spring. While Spring has many useful features like the IoC container and the MVC framework, to use it you still need to set up a lengthy framework configuration, define how the Spring component should work together and so on. On the other hand, Spring Boot bootstraps your applications in a few steps while taking care of configuration, installation of dependencies and auto-configuration of components. It also helps assemble components that should work together. (Learn more about Spring Boot.) This is why we will use Spring Boot as the application framework on top of Spring.
- Since we are going to create a automated testing framework that tests other applications, we need to choose a testing framework. TestNG will be the perfect match here. It’s not only the framework that allows you to create any type of tests: unit, component, end-to-end, etc. in a fast and easy fashion, it also supports integration with Spring Boot, which gives us more flexibility and explicit support in using Spring Feign with help of Spring Boot. To learn more about TestNG, refer to its documentation.
- Maven as a build tool. Maven is a project management tool that helps you build your project and manage documentation and resources. In terms of this blog we will use Maven to compile the Java code, and download all the libraries the test framework depends on.
Right now you may be wondering why we need to use these “heavy” libraries and technologies to create a test framework for RESTful APIs testing when there are already lightweight web services clients. However, once the framework is built, you will notice how elegant it is: all the interfaces have clear boundaries and functional purposes, there is no mixing between the layers, and low-level details and configuration are handled by the Spring Boot application.
As automated test engineers we need to focus only on business logic instead of the implementation of infrastructure. Extending such frameworks is also very easy.
Creating a New Feign Client Project in Your IDE
Let’s start with creating a new project. We chose the Intellij IDEA IDE, but you can use any IDE of your choice. There will not be any specific action that requires only using this IDE, so the code in this blog post can easily be exported to any IDE.
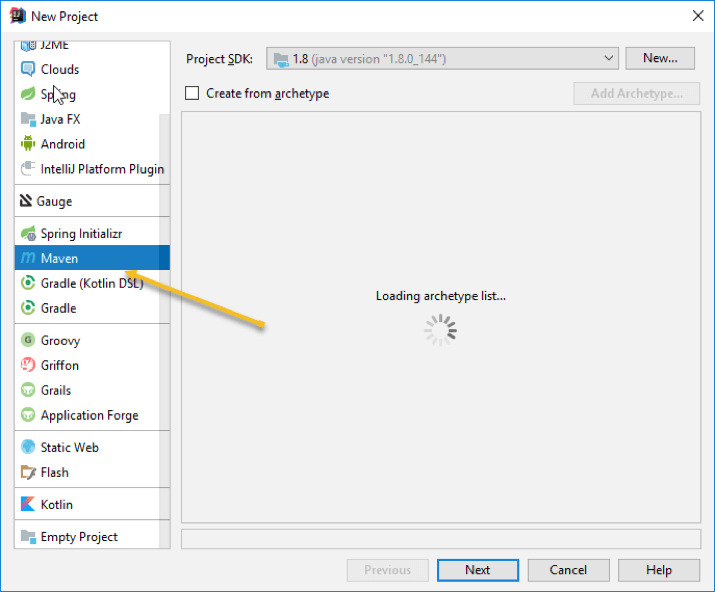
To create a project in Intellij Idea select: File -> New -> Project. Select Maven. Click on Next.
Now, specify a unique group id (consider a group as a tree of folders for your project), an artifactId (project name) and a version.
Once the project is created, the next step will be to define all the required dependencies in the pom.xml file that is in the project root.
Created from a template, the initial pom.xml looks like this:
<?xml version="1.0" encoding="UTF-8"?>
<project xmlns="http://maven.apache.org/POM/4.0.0"
     	xmlns:xsi="http://www.w3.org/2001/XMLSchema-instance"
     	xsi:schemaLocation="http://maven.apache.org/POM/4.0.0 http://maven.apache.org/xsd/maven-4.0.0.xsd">
	<modelVersion>4.0.0modelVersion>

	<groupId>com.blazemeter.apigroupId>
	<artifactId>SpringFeignClientsTestsartifactId>
	<version>1.0-SNAPSHOTversion>

project>
To add dependencies to the project, add them within the block.
Declaring a dependency from Spring feign:
<dependency>

<groupId>org.springframework.cloudgroupId>

<artifactId>spring-cloud-starter-feignartifactId>

<version>1.4.3.RELEASEversion>

dependency>
Spring boot dependency:
<dependency>

	<groupId>org.springframework.bootgroupId>

	<artifactId>spring-boot-starterartifactId>

	<version>2.0.0.RELEASEversion>

dependency>
TestNG dependency:
<dependency>

	<groupId>org.testnggroupId>

	<artifactId>testngartifactId>

	<version>6.11version>

dependency>
In summary, the complete dependencies will look like this:
<dependencies>

	<dependency>

    	<groupId>org.springframework.cloudgroupId>

    	<artifactId>spring-cloud-starter-feignartifactId>

    	<version>1.4.3.RELEASEversion>

	dependency>

	<dependency>

    	<groupId>org.springframework.bootgroupId>

    	<artifactId>spring-boot-starterartifactId>

    	<version>2.0.0.RELEASEversion>

	dependency>

	<dependency>

    	<groupId>org.testnggroupId>

    	<artifactId>testngartifactId>

    	<version>6.11version>

	dependency>

dependencies>
We have defined all the required dependencies to start creating feign clients to a remote server.
To configure a remote web service that is going to be used in this blog post please refer to the readme of the project on GitHub.
Creating Spring Feign Clients
Before proceeding further, first set up a mock for the RESTful service Feign Client that will be created as described in github repo of this demo.
To look at the Feign Client, refer to the code snippet from the src/main/java/com/blazemeter/blog/api/client package:
@FeignClient(name = "bookStoreClient", url = "http://" + "${host}" + ":${port}", configuration = BookClientConfiguration.class)
public interface BookStoreClient {

	@RequestMapping(method = RequestMethod.GET, path = "getBooks")

	public List<Book> getBooks();


	@RequestMapping(method = RequestMethod.POST, path = "buyBook")

	@Headers("Content-Type: application/json")

	public Book buyBook(@RequestBody Book book);

}
The Feign Client should be created as a Java interface without any implementation of the methods as it is how feign clients should work. All the implementations should be handled by Spring framework.
The annotation @FeignClient tells Spring that this interface should be used as Feign. In “FeignClient” properties we have added a unique name and URL. The URL variable tells “FeignClient” where to send all the requests associated with the client. As you can see it’s composed from the “http://” prefix with the host and port values attached from the application context by reading corresponding properties from the “application.properties” file. Also, we set up the configuration class to Feign, but this will be explained later when I explain POST request mapping.
Method List getBooks() helps to send the GET request to the “/getBooks” request of the service. To indicate that it is the method that should send web request we’ve used @RequestMapping annotation of the “Spring Web” package with the appropriate properties: request method GET and path “getBooks”. As response the method accepts a list of books.
The same applies to the “buyBook” method, but in terms of sending the POST request to “buyBook” endpoint. We use the annotation @RequestBody to indicate that the passed parameter “book” should be recognized as the equest body of the request. The @Headers annotation is used to send therequest header with the content-type of the request’s body.
The Feign Client doesn’t make any conversion of the requests bodies and parameters, but rather uses the Encoder and Decoder for that instead. Configured earlier, the web service, with the help of “MockServerManager”, consumes and produces the body in JSON format. To convert the buyBook method parameter “book” of the type Book to a JSON string, we need to specify the custom Encoder to Feign Client.
This is done in the “BookClientConfiguration” class as follows:
public class BookClientConfiguration {


	public Encoder feignEncoder() {

    	HttpMessageConverter jacksonConverter = new MappingJackson2HttpMessageConverter();

    	ObjectFactory<HttpMessageConverters> objectFactory = () -> new HttpMessageConverters(jacksonConverter);

    	return new SpringEncoder(objectFactory);

	}

}
Starting the Spring Boot Application
The HttpMessageConverter is defined as MappingJackson2HttpMessageConverter and passed within the ObjectFactory to a new Encoder entity.
OK, now we are done with configuring the web service and client and ready to start our Spring Boot application.
This is achieved with the Java application run class (with public static as the main method) where the Spring Boot application is started via the Spring runner.
@EnableFeignClients

@SpringBootApplication

public class BookStoreApplication {


	public static void main(String[] args) {

    	SpringApplication.run(BookStoreApplication.class, args);

	}

}
BookStoreApplication is marked with @SpringBootApplication to indicate that this is a Spring Boot application, the @EnableFeignClients annotation tells Spring Boot that we are going to use FeignClients and hence our application need to search for interfaces with @FeignClient annotation.
Now, we have fully configured the application to test web services.
Creating your First Test in the Test Package
Let’s create our first test in the test package of the project:
@SpringBootTest

public class WebServiceTest extends AbstractTestNGSpringContextTests {


	@Autowired

	private MockServerManager serverManager;


	@Autowired

	private BookStoreClient bookStoreClient;


	@BeforeClass

	public void startServer() {

    	serverManager.start();

	}


	@AfterClass

	public void shutDown() {

    	serverManager.shutDown();

	}


	@Test

	public void testService() {

		List<Book> books = bookStoreClient.getBooks();

		assert !books.isEmpty();

		Book bookToBuy = books.get(0);

		Book boughtBook = bookStoreClient.buyBook(books.get(0));

		assert bookToBuy.equals(boughtBook);

}
}
The test class is marked with the @SpringBootTest annotation, which runs tests for the Spring Boot application deployed earlier. There is one important note here: test classes marked as @SpringBootTest must reside in the same package tree as the Spring Boot Application class.
Extending from AbstractTestNGSpringContextTests gives us access to Spring Boot application context. From application context we injecting “MockServerManager” and “BookStoreClient” that are created automatically by Spring Boot application with help of @Autowired annotation.
To use those features, additional dependencies need to be added to pom.xml:
<dependency>

	<groupId>org.springframework.bootgroupId>

	<artifactId>spring-boot-testartifactId>

	<version>1.5.8.RELEASEversion>

	<scope>testscope>

dependency>

<dependency>

	<groupId>org.springframeworkgroupId>

	<artifactId>spring-testartifactId>

	<version>4.3.8.RELEASEversion>

	<scope>testscope>


	@Autowired

	private MockServerManager serverManager;


	@Autowired

	private BookStoreClient bookStoreClient;


	@BeforeClass

	public void startServer() {

    	serverManager.start();

	}


	@AfterClass

	public void shutDown() {

    	serverManager.shutDown();

	}


	@Test

	public void testService() {

		List<Book> books = bookStoreClient.getBooks();

		assert !books.isEmpty();

		Book bookToBuy = books.get(0);

		Book boughtBook = bookStoreClient.buyBook(books.get(0));

		assert bookToBuy.equals(boughtBook);

}
}
Please note that the above dependencies have a scope test and will be available only under the test package.
The test itself does the following:
Before any test starts the web service needs to be deployed and configured. This is done by calling the start() method of MockServerManager serverManager
@BeforeClass
	public void startServer() {
    	serverManager.start();
	}
In the test we get the list of available books by calling the appropriate method of the web service client. Then we check if there is at least 1 book available. By calling the method “buyBook” we buy the first available book and validate if the returned book is the book we were intending to buy. To compare two different books, we need to override the Object’s equals method for Book objects:
@Override

public boolean equals(Object o) {

	Book compareTo = (Book)o;

	return title.equals(compareTo.getTitle())

        	&& author.equals(compareTo.getAuthor())

        	&&price == compareTo.getPrice();

}
That’s it, now we can run our test.
All Tests that are under project test package can be executed by maven test command “mvn test”.
A single test can be started by “mvn -Dtest=WebServiceTest test“. The test results can be viewed as html report in build output directory/surefire-reports/index.html.
Why Use Spring Boot When Starting With Feign Clients
So why should you use Spring Boot if it needs so much configuration? Yes, you still need to make some changes, but it’s not intensive compared to the amount of time and effort you will spend configuring a comprehensive framework for a RESTful web service. You will need to do it only once and reuse it over projects if needed. In return, you will receive a well-built framework with clear functional boundaries where the
Feign Client takes care of all the low-level details and you can focus on business level targets! So, go ahead, try this approach yourself, and you will see how elegant the solution is!
Back to topBlazeMeter As an Alternative
Alternatively, you can use BlazeMeter’s new API Functional Testing solution, with 1000 free monthly API calls for API functional testing. Advantages of using BlazeMeter for API Functional Testing include:
- BlazeMeter has an intuitive UI to easily create API Functional Tests without coding.
- You can use the same tool to create performance tests and massive scale load tests for your API in a consistent way.
- BlazeMeter is based on open source technology and built for test automation, through dedicated Continuous Integration plugins for Jenkins, TeamCity and Bamboo and any other CI system through our CLI tool
- BlazeMeter provides comprehensive detailed reporting on request level as well as historic trend reports. Collaborate and share test results with teams.
To start your API Functional tests you can request a BlazeMeter demo.