Blog
September 3, 2020

Webhook listeners enable automating workflows. I’ve written in the past on the Runscope blog about using Google Sheets to listen for webhooks as well as how to create custom notifications from BlazeMeter API Monitoring (previously known as Runscope) using webhooks. Here I will go into more detail about how to build a webhook listener with BlazeMeter API Monitoring.
Back to topWhat are Webhooks?
Working with webhooks can give you superpowers to automate all different sorts of workflows — whether it is getting notified when a new commit is made in GitHub, triggering an internal notice when an underlying service goes down, or turning on your lights when your garage door opens.
Many services have pre-built integrations powered by webhooks to do common actions. But what about when you want to do something custom?
Various third-party services — like Zapier and IFTTT — can help you create these custom workflows.
Back to topHow to Use Webhook Listeners With BlazeMeter
But did you know that you can create these workflows directly in BlazeMeter using our API Monitoring functionality? In this blog post I will show you how you can do this!
BlazeMeter API Monitoring has a built-in integration with Slack. But sometimes we get requests from customers about having a custom Slack notification. It turns out you can do this by using API Monitoring as a webhook listener. To do so, we will create an API Monitoring test that:
- Starts when your base test is complete
- Receives an inbound request (the webhook)
- Makes a post request to Slack with your custom notification
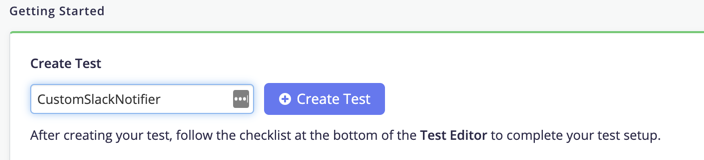
To create a custom notification, we are going to build a separate API Monitoring test to make the notification. Let's start by creating a new test:
The first step in our test will be an incoming request step. This step will receive the data from our webhook so we can take the relevant information and use it in our custom notification. For this use case, it is important that we use a Fixed URL for this incoming request.
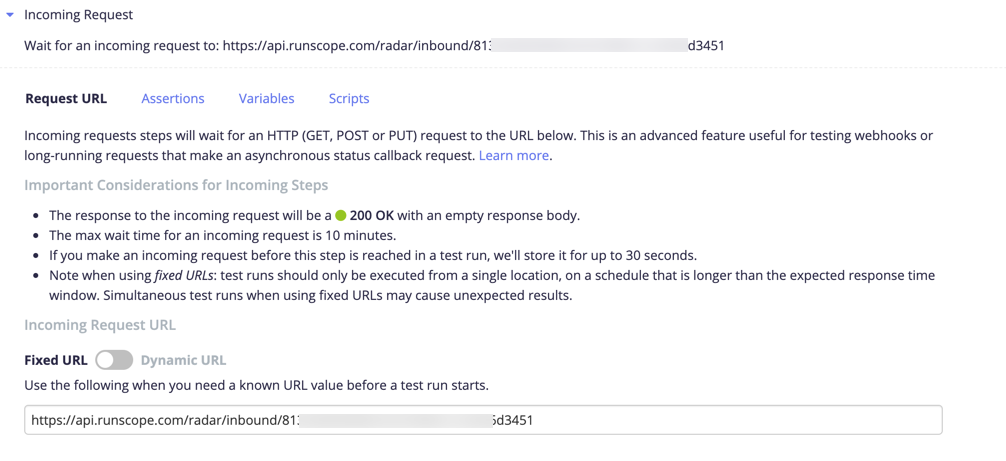
Copy this URL as we will need it later when we configure the base test notification settings.
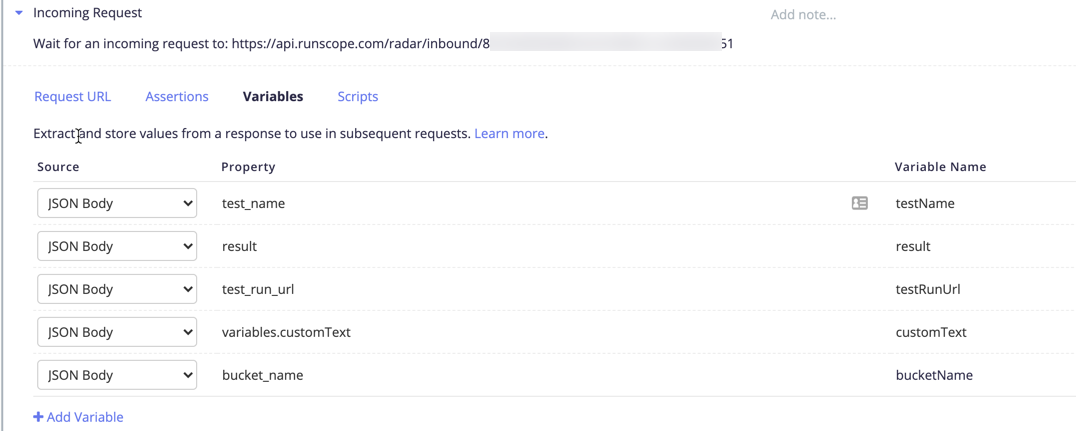
The next thing we need to do is configure variables. These variables will be used to take data from the webhook payload and use it in our custom notification. Since we are working with webhooks coming from API Monitoring, we can see the structure of the payload in our documentation.
{
	"finished_at": 1598299915.773878,
	"variables": {
		"customText": "This is a custom message from my original test -- oh no your test has failed!"
	},
	"agent": null,
	"team_id": "REDACTED_RUNSCOPE_TEAM_ID",
	"result": "fail",
	"team_name": "SRA Runscope",
	"started_at": 1598299914.353208,
	"agent_expired": null,
	"environment_uuid": "REDACTED_RUNSCOPE_ENVIRONMENT_UUID",
	"environment_name": "Test Settings",
	"test_run_url": "https://www.runscope.com/radar/REDACTED_BUCKET_KEY/REDACTED_TEST_UUID/results/REDACTED_TESTRUN_UUID",
	"test_run_id": "REDACTED_TESTRUN_UUID",
	"bucket_key": "REDACTED_BUCKET_KEY",
	"region_name": "US California - None",
	"bucket_name": "Customer Success",
	"test_name": "Sample Base Test",
	"test_id": "REDACTED_TEST_UUID",
	"region": "us2",
	"initial_variables": {
		"customText": "This is a custom message from my original test -- oh no your test has failed!"
	},
	"test_url": "https://www.runscope.com/radar/REDACTED_BUCKET_KEY/REDACTED_TEST_UUID",
	"trigger_url": "https://api.runscope.com/radar/REDACTED_TRIGGER_UUID/trigger",
	"requests": [{
		"response_size_bytes": 293,
		"url": "https://yourapihere.com/",
		"variables": {
			"fail": 0,
			"total": 0,
			"pass": 0
		},
		"step_type": "request",
		"note": "",
		"result": "fail",
		"response_status_code": "200",
		"scripts": {
			"fail": 0,
			"total": 0,
			"pass": 0
		},
		"method": "GET",
		"response_time_ms": 71,
		"assertions": {
			"fail": 1,
			"total": 1,
			"pass": 0
		}
	}]
}
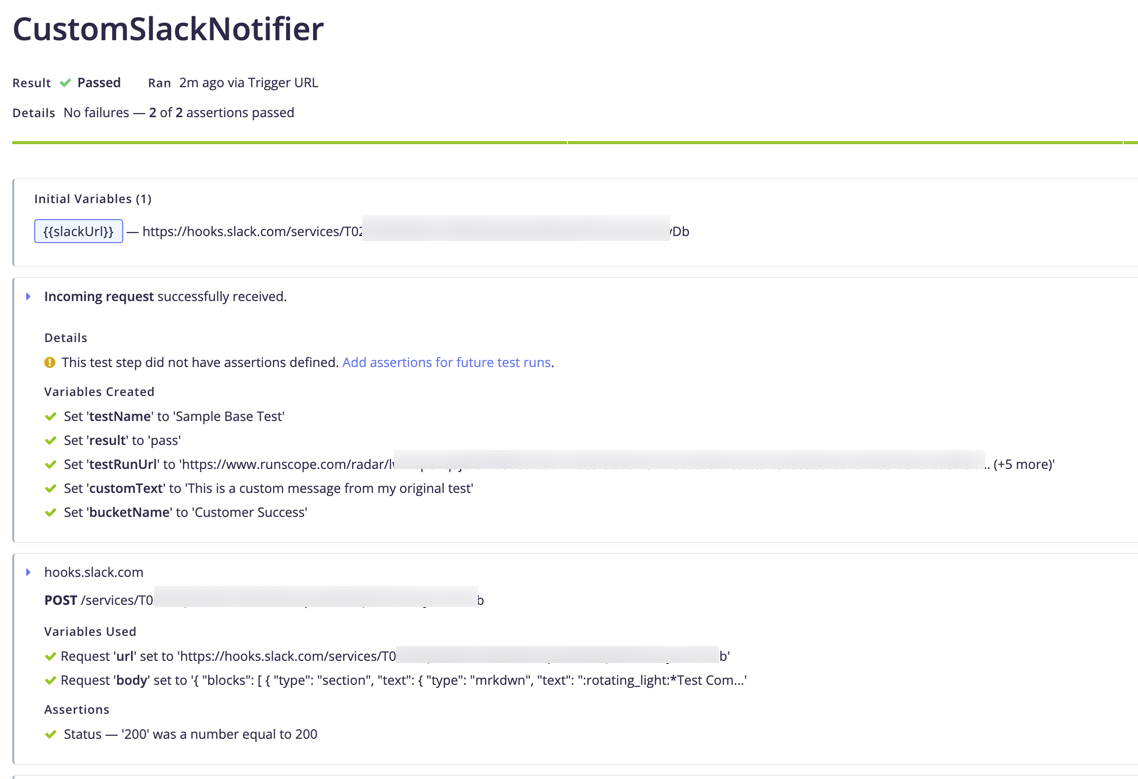
We can assign whichever properties we want to reference in our custom notification to variables. (Note that variables from your original test will be properties within the variables property of the webhook payload. My base test creates a variable called “customText” which I use in my custom Slack notification.)
Example: A Webhook Listener For Slack
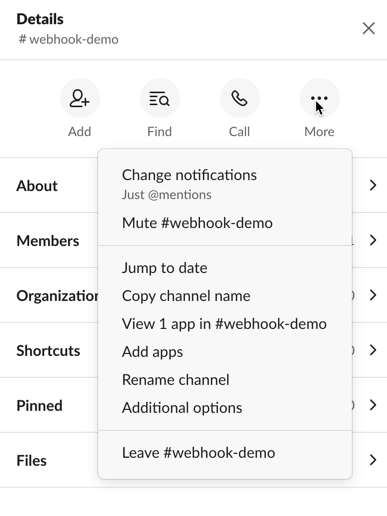
(Note: you may need to work with an administrator of your Slack instance to get this set up.)
Once we assign these properties to variables, we can add an additional step to make our custom post to Slack. The specifics of posting a custom message to a Slack Channel are beyond the scope of this blog post, but you can read more details in Slack’s documentation. The easiest way to post a message to Slack is to use their incoming webhooks. (Note that we can’t send the webhook directly from our original API Monitoring test to Slack because we don’t control the payload of that webhook.)
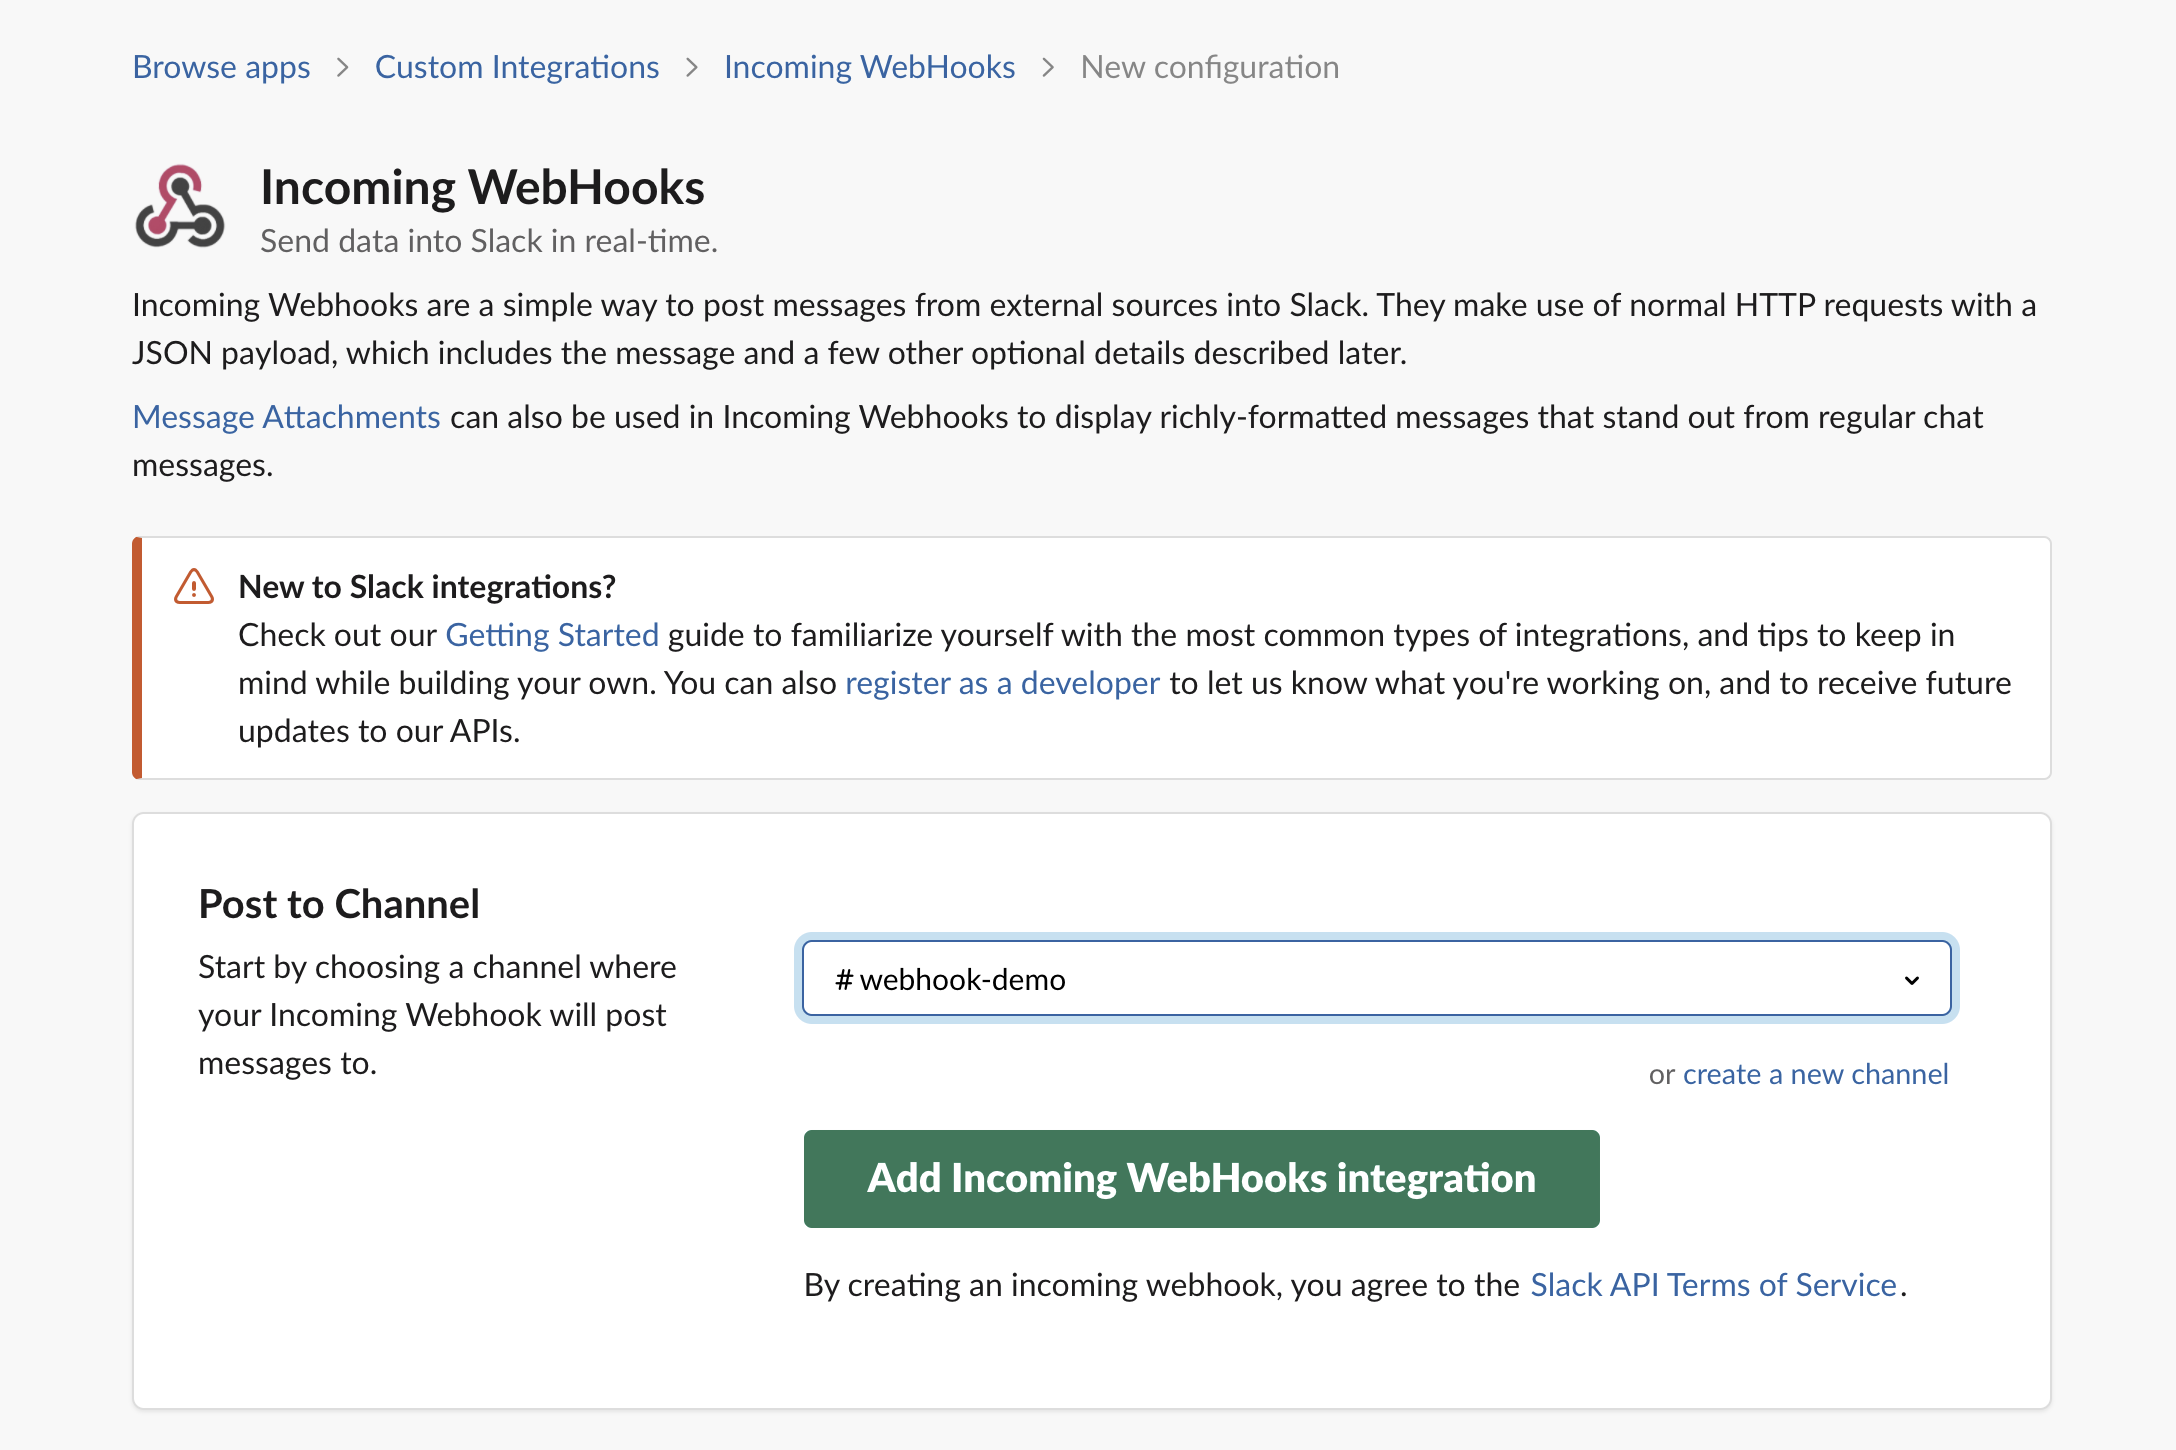
From your Slack channel, you select Add Apps and then choose Incoming Webhooks.
You can then add the Incoming Webhook, making sure to select the correct Slack channel as your Post location.
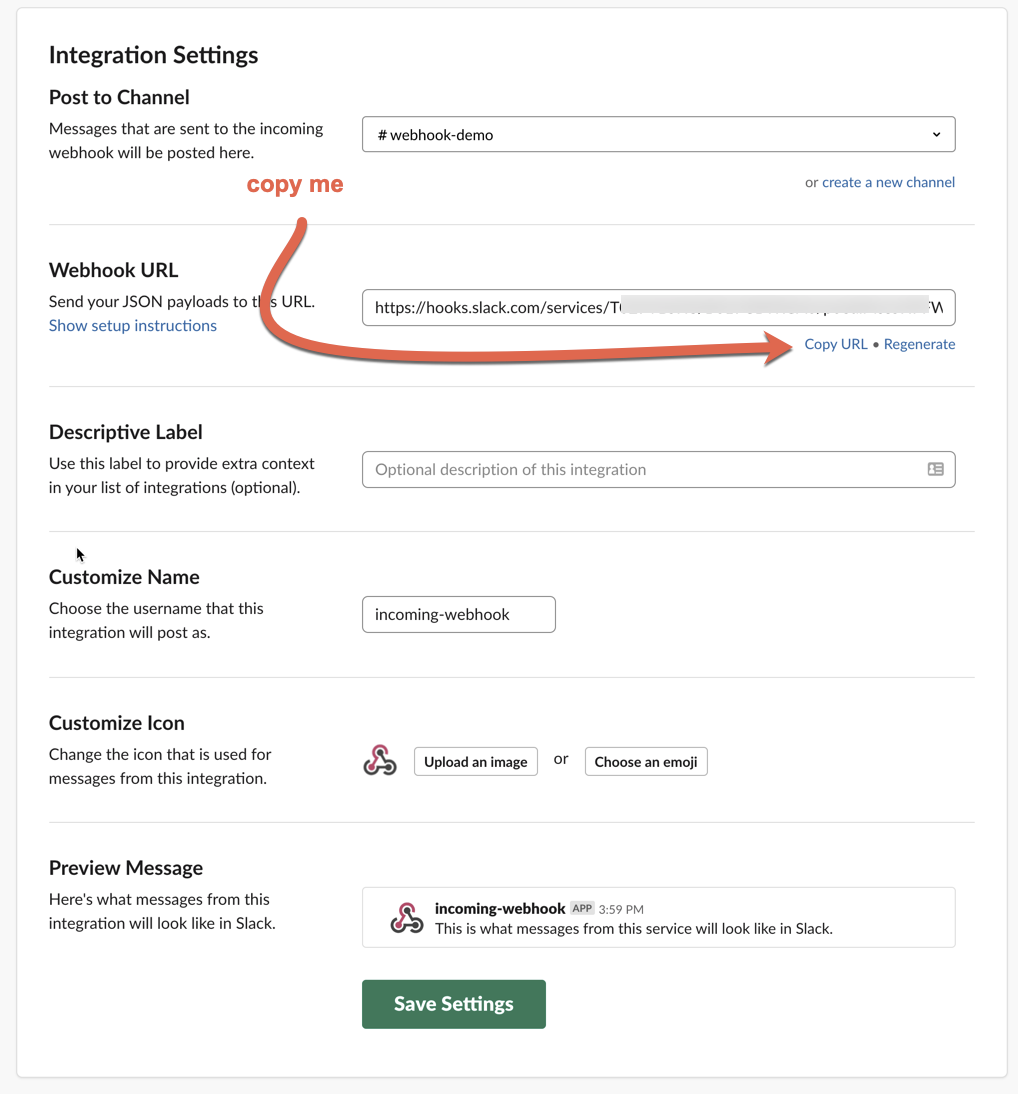
There are a variety of customizations you can make on the subsequent page, but the key thing is to copy the Webhook URL and Save the Settings.
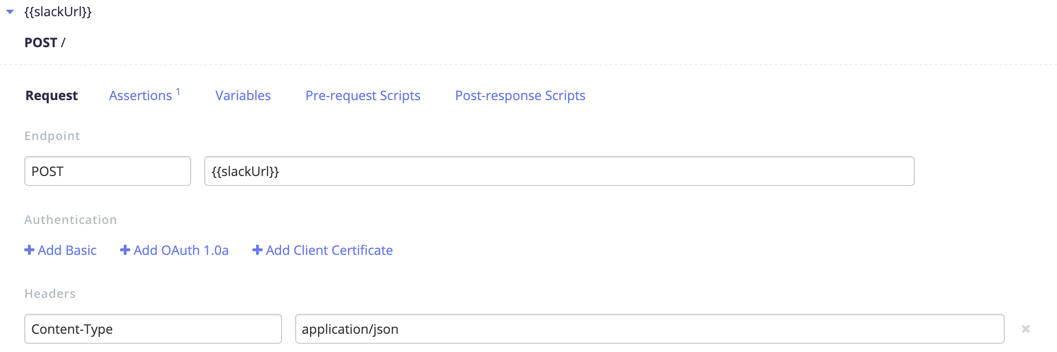
Returning to the CustomSlackNotifier API Monitoring test, we now add a Request Step in which we make a POST request to the Slack URL. You’ll see below, I’ve saved my Slack URL as an initial variable in my Environment, and then referenced it in the step. For Slack, we need a Content-Type header with a value of “application/json”. And then to post the custom message you need to add a JSON Body.
Example JSON body:
{
	"blocks": [
		{
			"type": "section",
			"text": {
				"type": "mrkdwn",
				"text": ":rotating_light:*Test Completed:* <{{testRunUrl}}|{{testName}}>:rotating_light:"
			}
		},
		{
			"type": "divider"
		},
                {
			"type": "section",
			"text": {
				"type": "mrkdwn",
				"text": "Your API Monitoring Test is Complete :confetti_ball:"
			}
		},
		{
			"type": "section",
			"fields": [
                        {
				"type": "mrkdwn",
				"text": "*Test Status:*\n{{result}}"
			},
                        {
				"type": "mrkdwn",
				"text": "*Bucket:*\n{{bucketName}}"
			}]
		},
		{
			"type": "section",
			"text": {
				"type": "mrkdwn",
				"text": "*Message*\n{{customText}}"
			}
		}
	]
}
(You can read more details about designing custom Slack messages here: https://api.slack.com/block-kit/building)
Now we have a complete test that will take in webhook data and create a custom Slack notification for the channel we chose. All that remains is to wire it up to our original test.
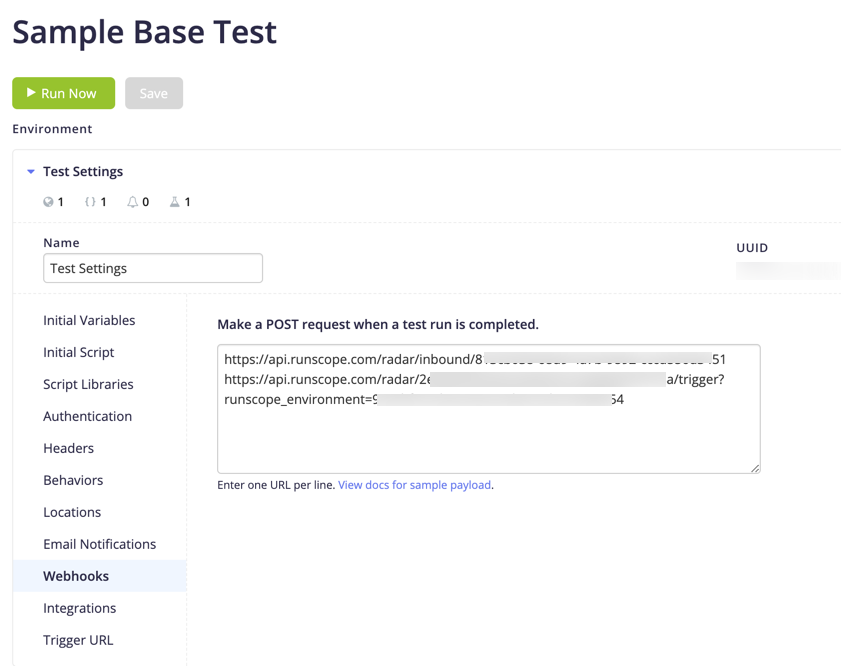
To do this we will take the Inbound URL we copied before and paste it into the Webhooks tab of our base test. We will also need the Trigger URL from our CustomSlackNotifier test so that we can kick off the CustomSlackNotifier test each time the base test completes. This way, each time our base test completes running, it will start the CustomSlackNotifier test running which is now listening for Webhook in the Inbound request step.
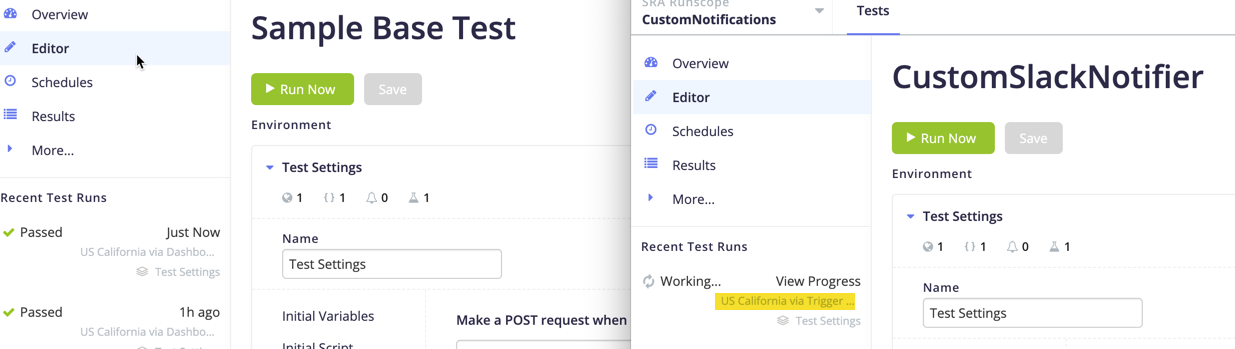
Below you can see a screenshot of the Trigger URL for the CustomSlackNotifier test followed by a screenshot of the Webhooks configuration for the base test.
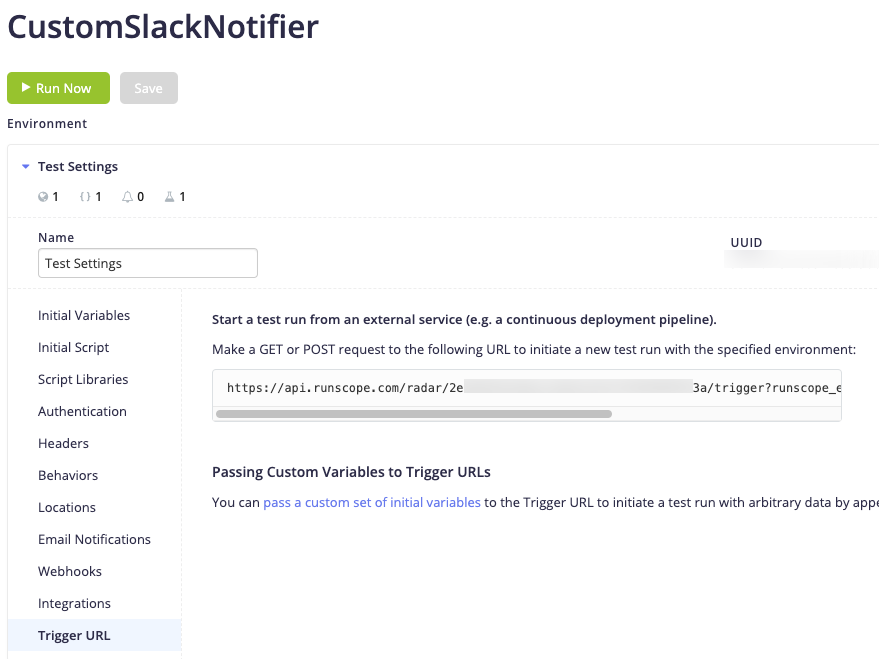
Copy this URL, and paste it into the base test webhook as a second webhook on a new line.
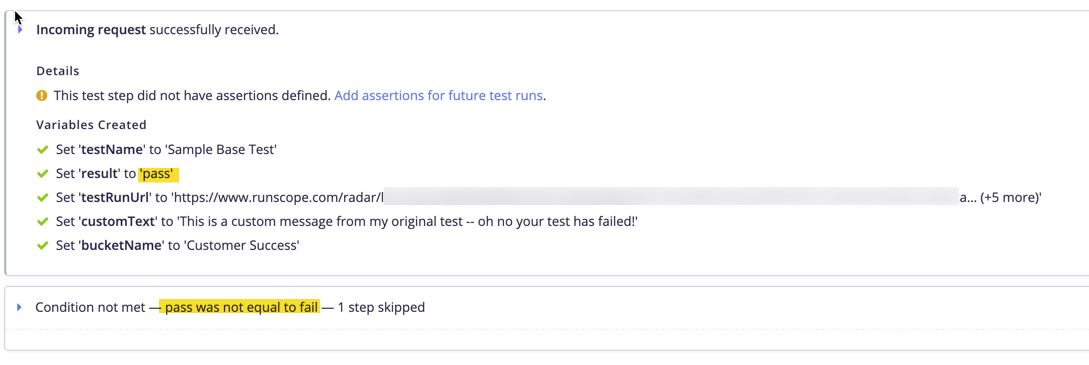
Finally, we can run our base test. You will see that once the base test completes, your CustomSlackNotifier test kicks off.
The CustomSlackNotifier test will receive the data from the base test, and use it to make a post to Slack.
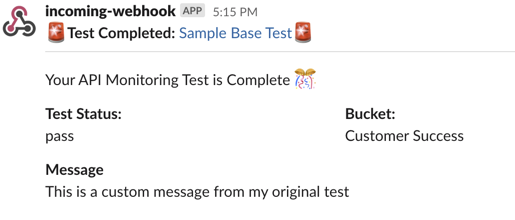
If all has gone well, you should now see your custom notice in Slack!
Notify only on Failure with a Webhook Listener
Suppose you only want to get a Slack notice if your test has failed? You can do this by modifying your CustomSlackNotifier test to use a Condition Step, and embed the Slack post step inside that condition step. If you set “{{result}} equals fail”, then you will only make your post to Slack if the base test fails.

Alternatively, you can use the Advanced Webhook listener instead of base webhooks for both webhook URLs, and create more complex configurations, such as to only receive a notification after multiple failures.