Blog
August 26, 2021

Have you tried Vegeta load testing?
This blog post will explain how to easily run your Vegeta load testing in BlazeMeter in just a few steps.
Back to topWhat Is Vegeta Load Testing?
Back to topVegeta is an open-source Golang HTTP load testing tool, which is versatile and easy to use.
How to Do Vegeta Load Testing and BlazeMeter
BlazeMeter now enables testers, developers and DevOps to run Vegeta load testing.
BlazeMeter supports Vegeta as an executor through the Open Source test automation framework Taurus. If you are considering creating a Vegeta script with BlazeMeter for the first time, I recommend reviewing the Creating a Taurus Test article in the BlazeMeter Guide.
Taurus consumes configuration files written in JSON or YAML, and it can reference Vegeta scripts.
1. Create your Vegeta target file.
This is an example Vegeta target file. It is a minimal example of the Vegeta syntax that demonstrates how to open a web page. You will replace this file with one of your existing Vegeta scripts.
GET https://blazedemo.com
    Content-Type: application/json
2. Write a Taurus test for Vegeta in a text editor.
You can learn more about Taurus testing here, or you can just use the following example script with a minimal configuration as a template:
execution:
    - executor: vegeta
      concurrency: 100
      hold-for: 1m
      scenario: simple

    scenarios:
      simple:
        script: vegeta_example.in
Make sure to set the executor name to ‘Vegeta’. In this example, I have set the number of concurrent users to 100 and the test will run for one minute. You can set those two parameters to any numbers of your choice. And don’t forget to put your Vegeta target file (here vegeta_example.in) into the scenario section of the file.
3. Store the code in a YAML file.
Here it’ll be ‘vegeta_example.yml’.
4. Make sure you have both files.
The Taurus test and the Vegeta target file. These two files are necessary for the performance test to run.
5. Log on to https://a.blazemeter.com.
You can create a free account if you don’t have one.
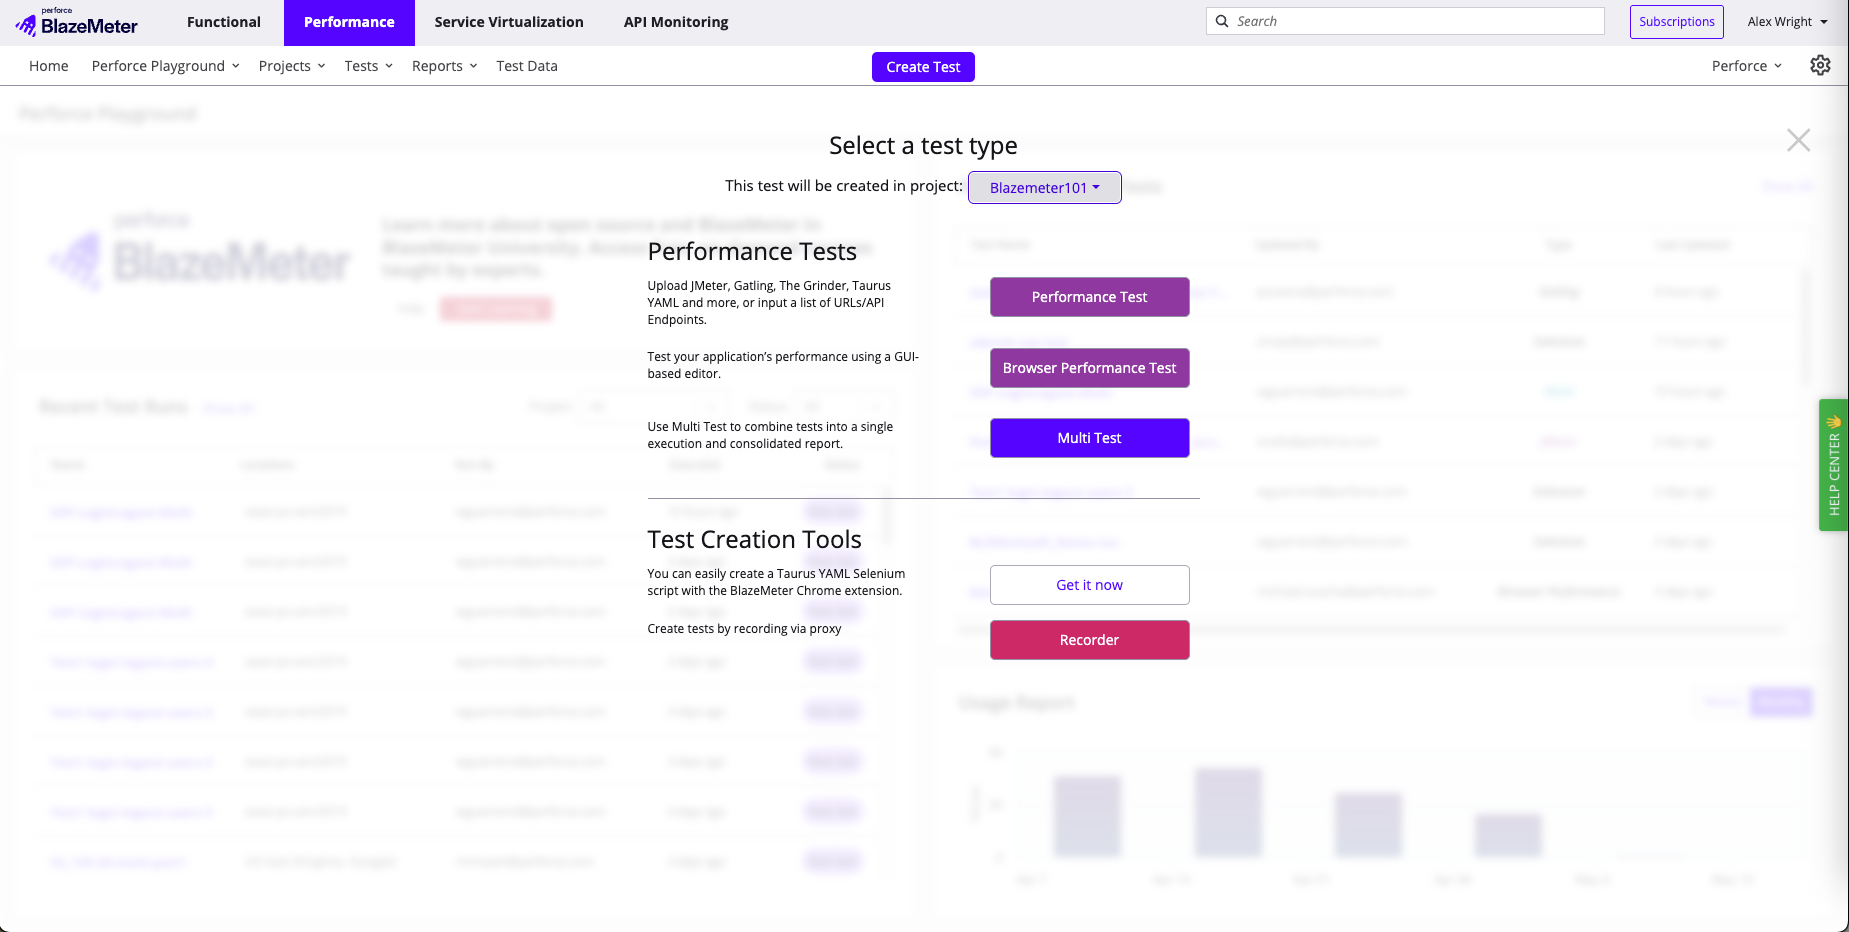
6. Create a new Performance Test by clicking on “Performance” -> Create Test -> Performance Test.
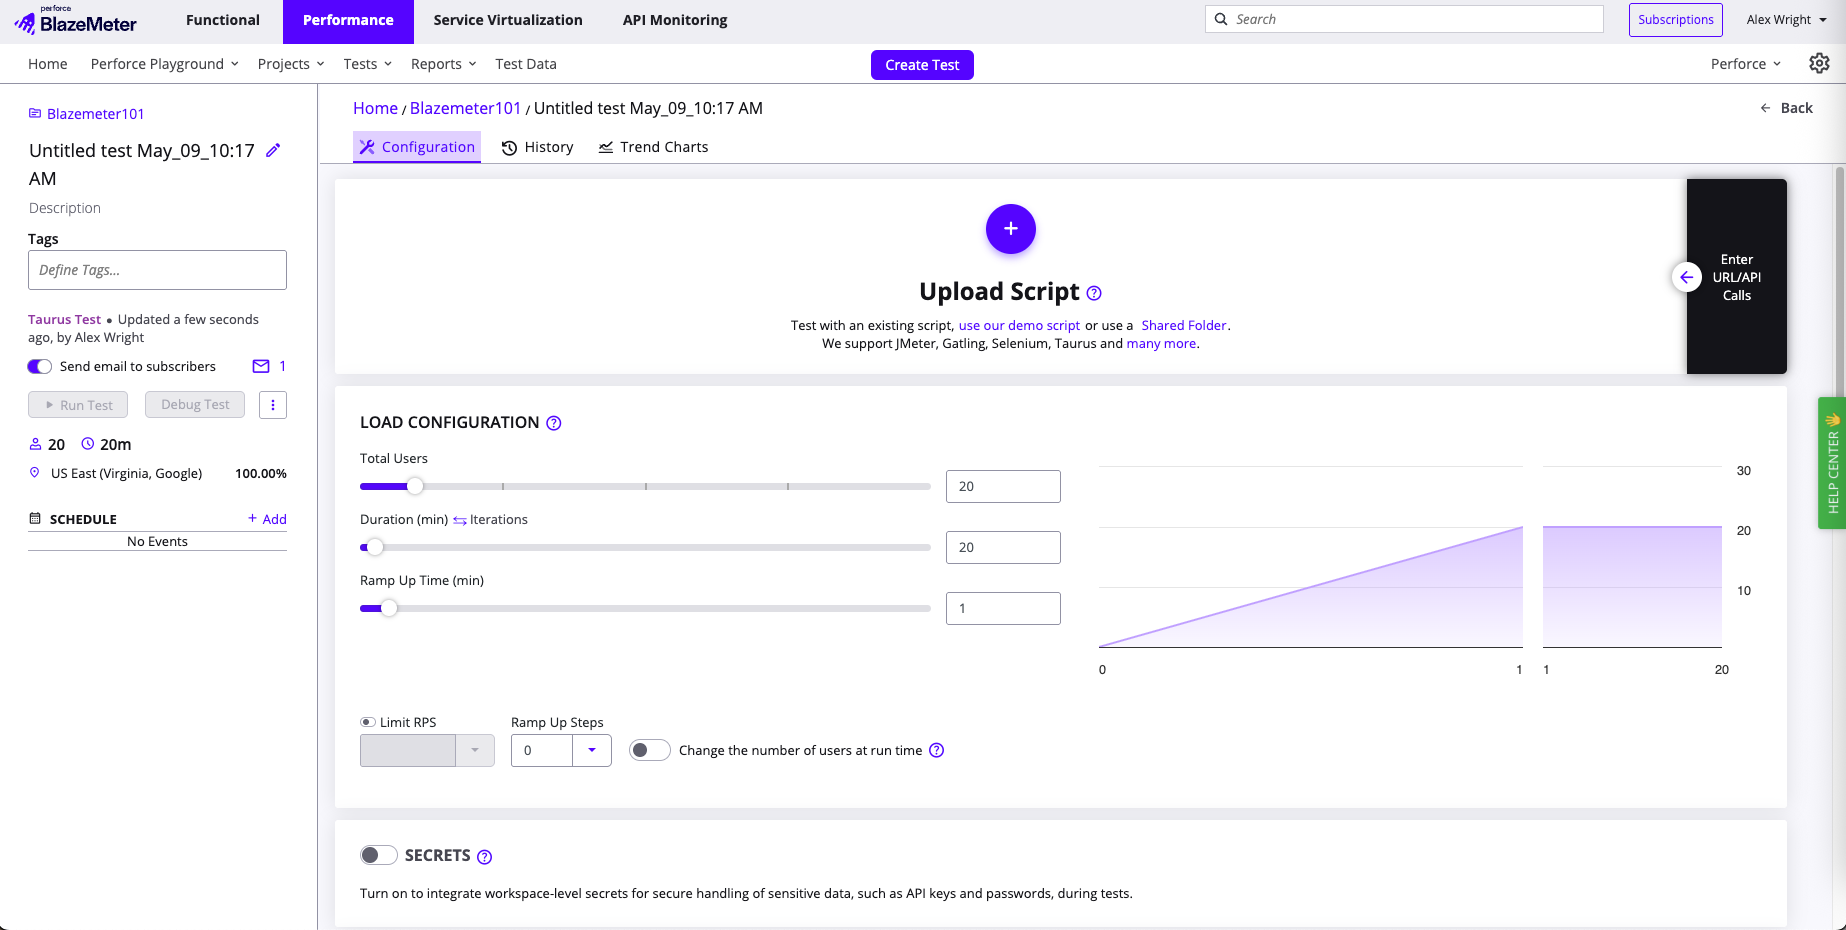
7. Upload both files.
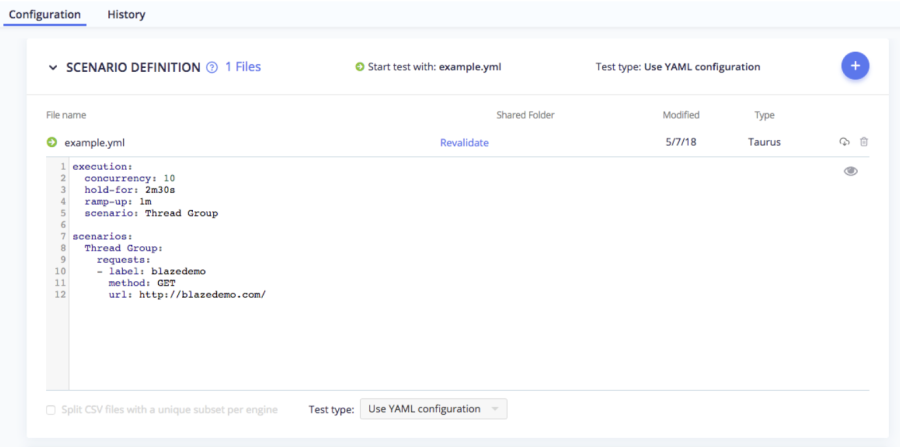
8. Make sure that both files have been uploaded.
Verify that the ‘Scenario Definition’ section looks like this:
9. Click 'Run Test'.
On the left side and wait for it to finish.
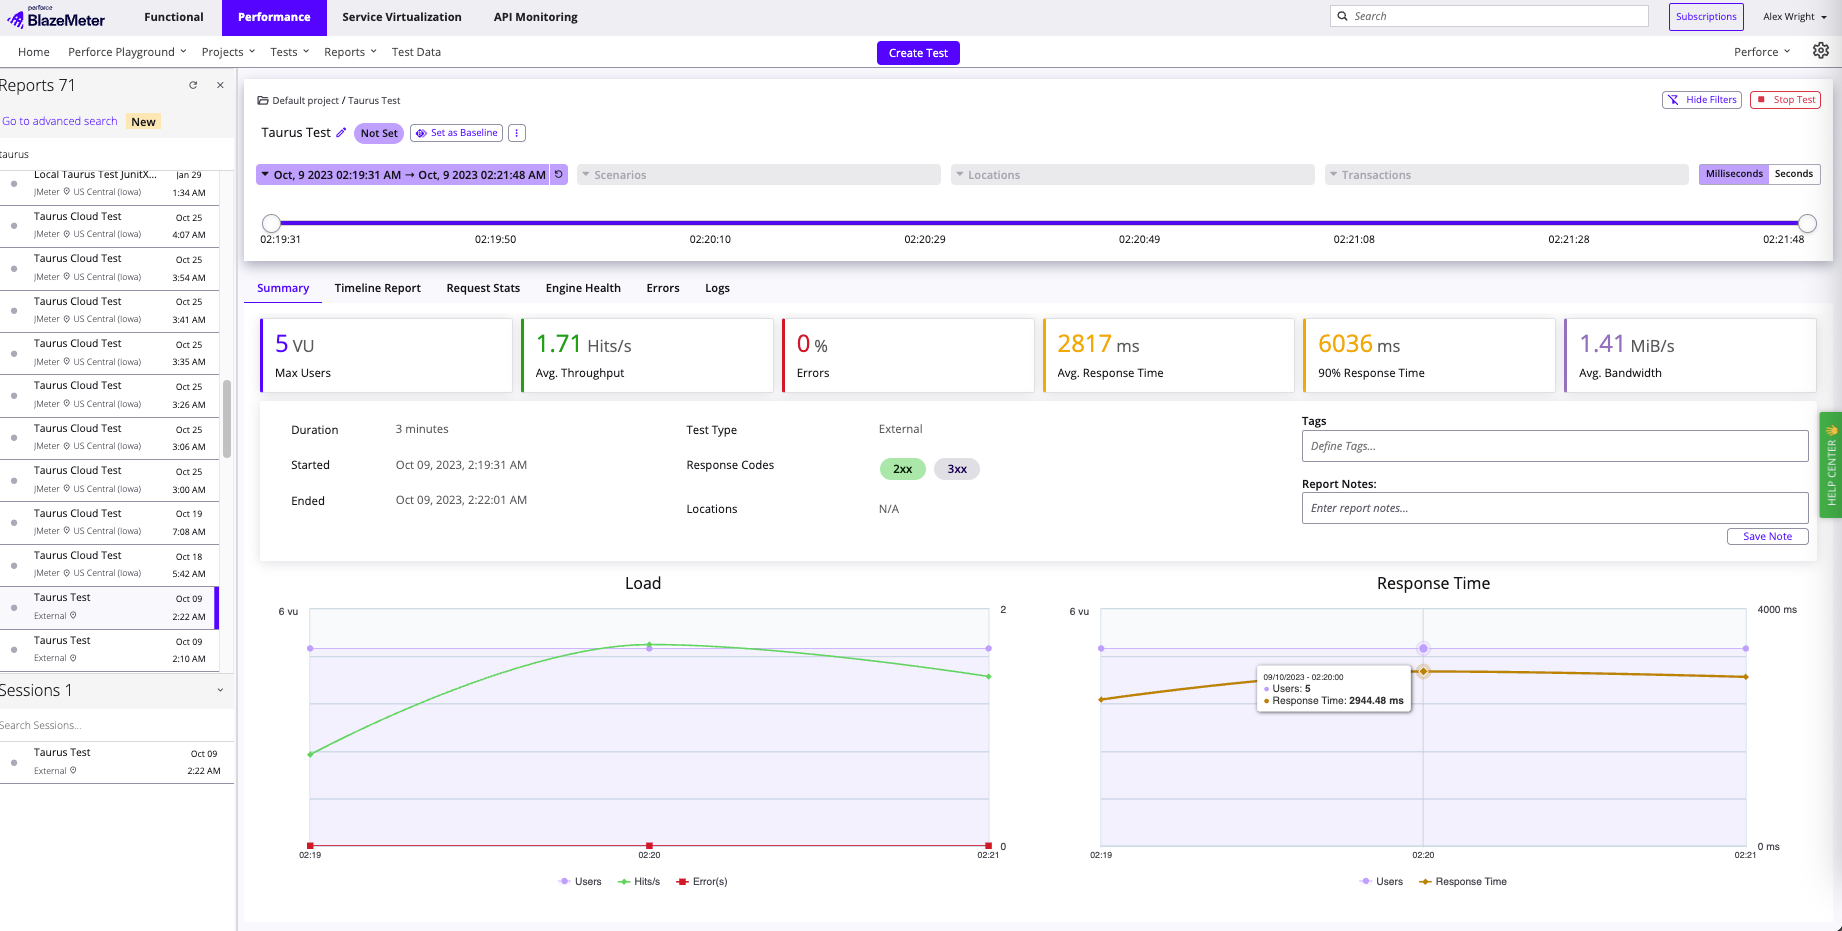
10. See Results.
After the test has completed running, you will see results in a table similar to the following screenshot:
And that’s it! Continuous testing is key to delivering with quality, volume, and velocity. But integrating, maintaining, learning and switching between multiple tools wastes valuable time and resources. BlazeMeter makes it easy with a super intuitive platform that does it all.