Blog
January 1, 2019

If your testing environment consists of a Tomcat servlet container, (maybe with an Apache web server), bottlenecks may appear. A Tomcat servlet container communicates to a web server using the Apache JServ Protocol - AJP. So, to evaluate the performance of the Tomcat engine, it’s natural to communicate to it using the the same AJP protocol.
Back to topWhat is AJP?
AJP is a binary protocol committed to routing requests from a web server to application servers. AJP is more optimized than HTTP for web server to application server communications, because it is a more compact binary protocol. For example, a method of a request (“POST” or “GET”) is encoded as only one byte, and each header as just two bytes. So, it’s significantly less information to send, and, therefore, each request is processed much faster.
By using Apache JMeter™, you can simulate AJP requests with a sampler that can send these requests and gets responses - the AJP/1.3 Sampler. You can also use this JMeter sampler to load test the WildFly, Jetty and GlassFish servlet containers, which also use AJP. This blog post will teach you how to load test Tomcat.
Requests are processed roughly in the following way:
- The client sends an HTTP request to a web server.
- The web server, configured to use the mode_jk connector, translates the HTTP request to an AJP request and sends it to one or more application servers.
Here is a basic diagram of connections between the Client, front-end Apache Web Server and Tomcat Application Servers: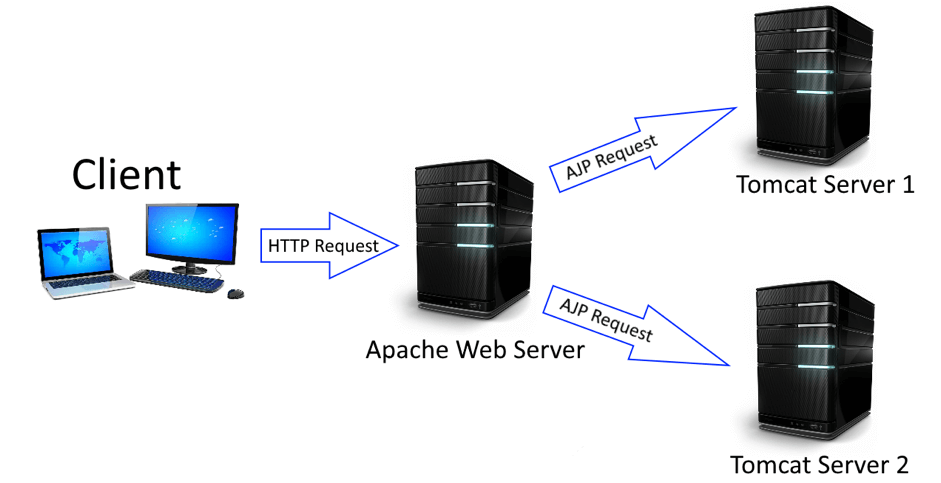
For architectures like this, the JMeter AJP/1.3 Sampler enables testing each AJP connection in your system, by sending AJP requests to any application server, and finding bottlenecks.
There are three versions of an AJP - 1.2 (deprecated), 1.3 and 1.4 (experimental). JMeter’s AJP/1.3 Sampler supports the 1.3 version.
Now let’s learn how to use it.
Back to top
The AJP Sampler for Tomcat Load Testing
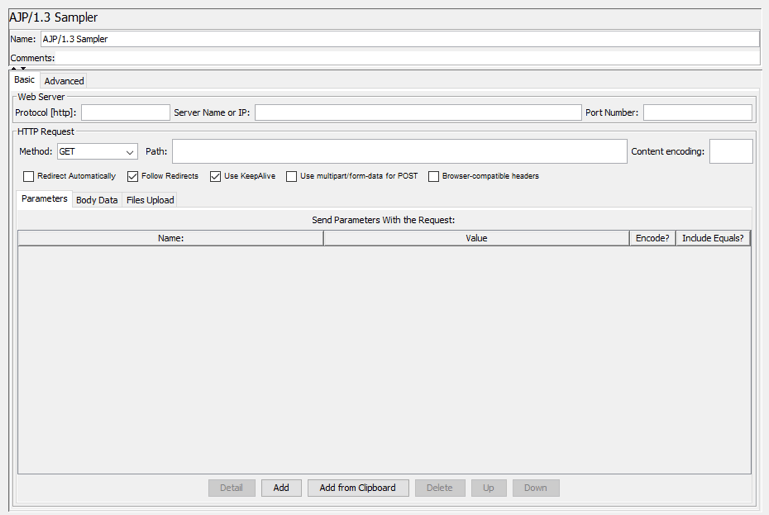
The AJP/1.3 Sampler translates the HTTP request set in this component to an AJP request. As you can see, it has a similar GUI to the HTTP Sampler.
- Server Name or IP: specify the server name or the IP of a server with your servlet container instance.
- Port: the default port for AJP is 8009.
- Method: an HTTP method to be used with your request.
- Path: a URL to your resource.
- Parameters: here you can specify parameters for your request.
There is only one limitation for the AJP Sampler - the current implementation doesn’t support uploading multiple files in one request. Only the first file will be uploaded. You can use multiple AJP Samplers to upload multiple files.
Back to top
Setting Your Tomcat Load Test Demo Environment
Now let’s see how the AJP Sampler works in a JMeter script. First, we’ll launch a Tomcat instance on our local machine and configure it to send POST Requests. A Tomcat9 distribution come with some servlet examples, that can be used to check AJP requests.
Our testing scenario is:
- We will use the “Request Parameter” example, provided by Tomcat, that simulates sending parameters with a POST request.
- We will send a POST request with some parameters and then receive a response that shows the values for these parameters.
1. To launch a Tomcat instance on your server, you have to have a Java Runtime Environment installed and configured (JRE_HOME environment variable set). You also need to set the CATALINA_HOME environment variable to a root folder of downloaded Tomcat, and add a %CATALINA_HOME%\bin value to the list of PATH environment variables.
2. After all the preparations are done, execute a “catalina run” command in the command line. Your Tomcat web-interface can now be accessed by localhost:8080 URL.
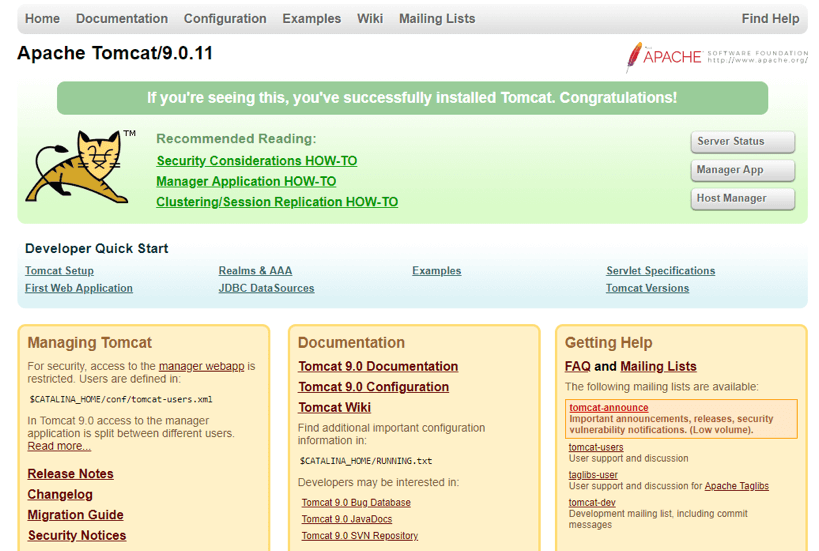
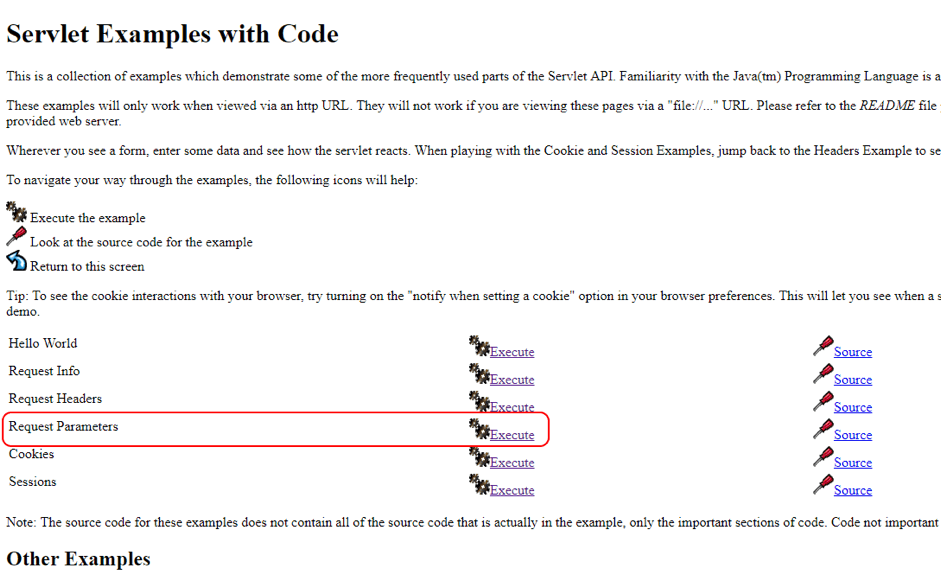
3. You can check the example apps through the the “Examples” link under “Developer Quick Start”:
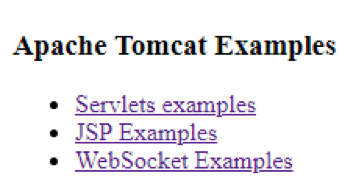
4. Let’s test the servlet example “Request Parameters”:
5. In this example we can execute a POST request to set “firstname” and “lastname” fields.
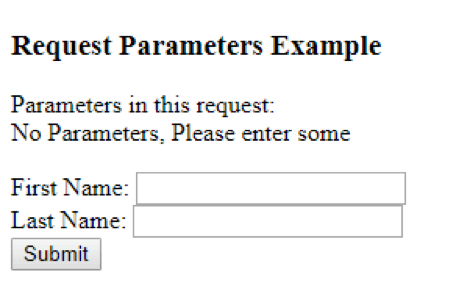
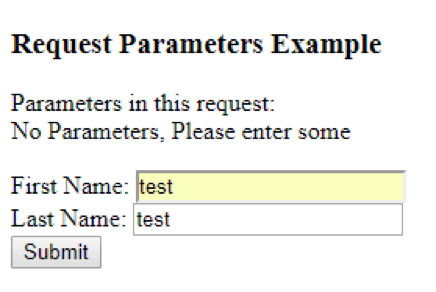
6. Let’s manually enter some values and see the response.
7. Press the ‘Submit’ button.
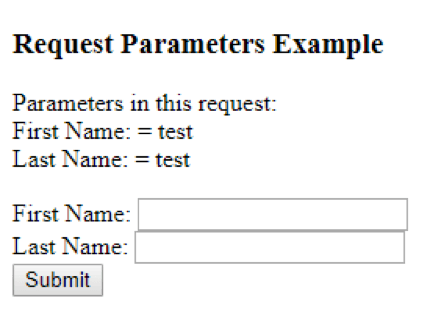
The entered values are assigned to the “firstname” and “lastname” fields.
Now, we will try to reproduce this request by using the AJP Sampler.
Back to top
Creating a JMeter Script with the AJP Sampler
In the previous section we saw that this servlet accepts two parameters and then returns them in the response. Now let’s use the AJP Sampler to send the AJP POST request with some parameters to our server via JMeter and check that we get the same parameters in the response.
1. Open JMeter and add a Thread Group to your Test Plan.
Right Click->Add->Threads (Users)->Thread Group

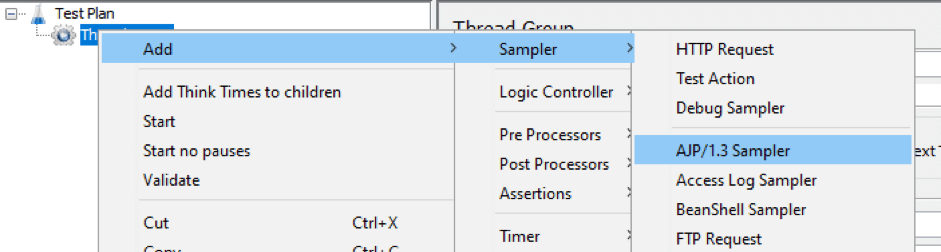
2. Add an AJP Sampler to your Thread Group.
Right Click->Add->Sampler->AJP/1.3 Sampler
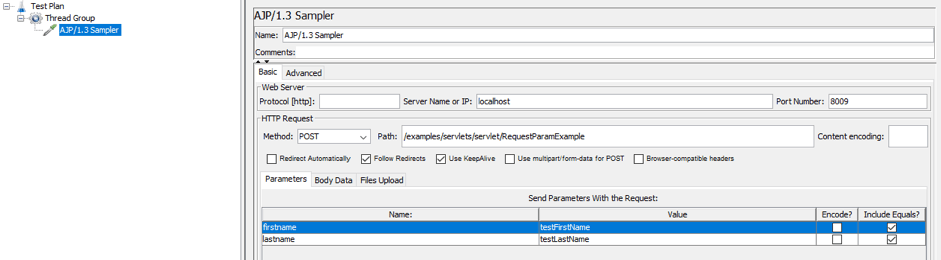
3. Configure the AJP Sampler exactly as you would configure an HTTP Sampler.
- Set the Server Name to “localhost”, because our Tomcat instance is running on our local machine.
- Set the Port to “8009” (default AJP port)
- Set the Method to “POST” to set parameters on the server with our request.
- Set the Path to “/examples/servlets/servlet/RequestParamExample” - that is the path to our “Request Parameter” example servlet, as you can see it in the your browser’s address bar.
- Specify parameters to send with the request (could be any):
- firstname: testFirstName
- lastname: testLastName
Our finished sampler will look like this:
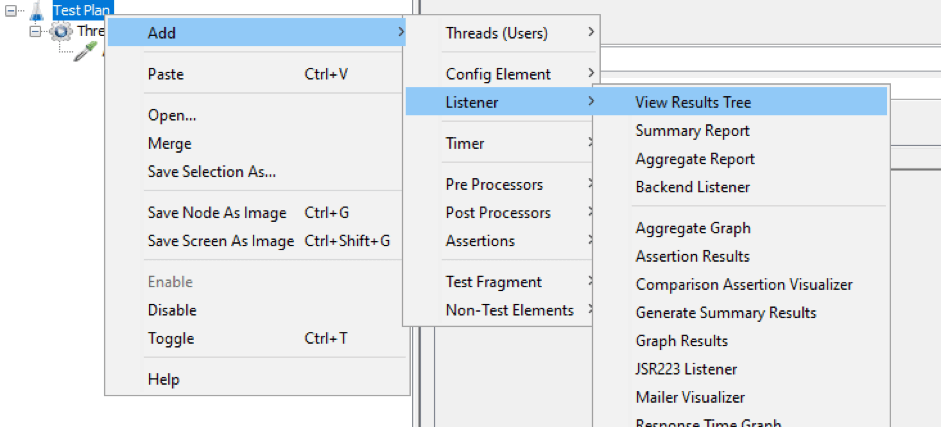
4. Add a View Results Tree Listener.
Right Click->Add->Listener->View Results Tree
5. Now we can execute our script and see the results in the listener.
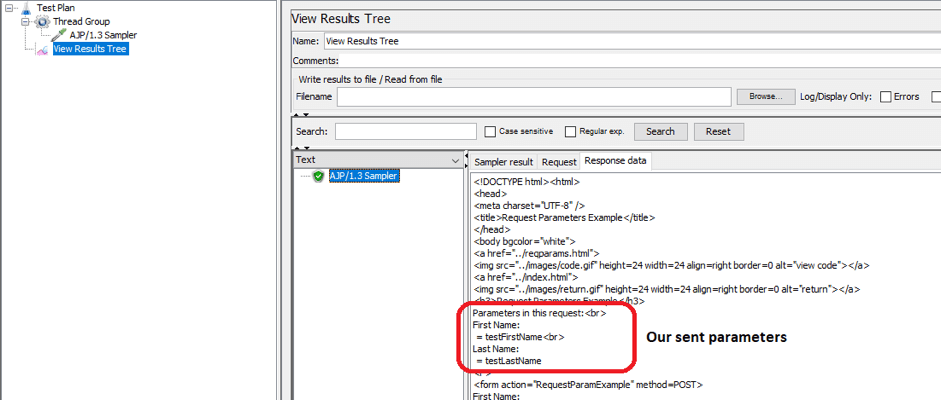
Here we can see our sampler successfully sent the AJP request to our server with the specified parameters. We see that our parameters are listed under “Parameters in this request” section - this means our server successfully got our request.
Congratulations! You now know how to load test AJP and Tomcat servers. To run your test in an even easier manner, upload your script to BlazeMeter and run it smoothly in the cloud. You will get scalability, collaboration options and advanced reporting.