Blog
June 17, 2022

Throughput in JMeter is an important feature to understand since it enables you to comprehend and manage user request frequency. In this blog, we break down the basics of JMeter throughput so you can build accurate testing use cases that simulate real-world traffic to your website.
What Is JMeter Throughput?
Back to topJMeter Throughput is a feature that allows you to manage the frequency of requests. This is especially important for tests that simulate real use cases.
Why JMeter Throughput Is Needed For Testing
JMeter is a popular open source load testing tool that helps developers and testers simulate traffic on their website or app. By using JMeter, engineers can ensure their website doesn’t slow down or crash during a traffic spike.
By simulating users through threads, developers and testers check the behavior of their app, identify bottlenecks, and can fix any errors. Therefore, it is important that our tests simulate real user patterns.
The Testing Problem
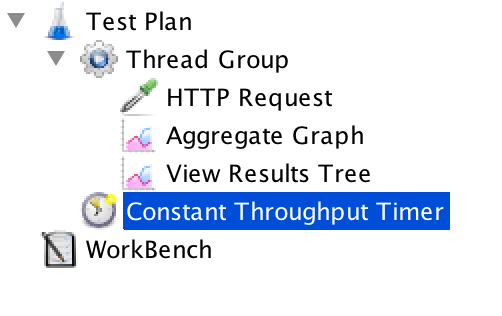
The simplest test plan in open-source JMeter is a single Thread Group that contains both the HTTP Sample Requests AND the View Results Tree at the end of test plan.
In this case, JMeter will send requests one by one without any pauses in between.
But in production, there are always:
- Intervals between requests.
- Brief (millisecond type) network delays.
- Human delays. On the most basic human level, we still need some time to think and click links.
These lags in production make it clear why we need to reproduce actual user behavior. While our test may run successfully when we take these factors out of the equation, our app might crash in production.
Solution: JMeter Throughput Timer
In this case, we have a fixed quantity of users but we need to test the application with a different number of requests per minute. Using the Thread Group parameters we can manage the number of users but not the frequency of requests, i.e. how often these requests start in a certain time period. So, how can we deal with this important scenario?
JMeter has a group of elements, which are called “Timers”. And one of them has an obvious title – “Constant Throughput”. This is what we need to control request frequency.
Constant Throughput is a calculator that checks the number of requests per time unit. An example of this calculator is checking the number of requests from the beginning of the first sample to the end of the last sample, including intervals.
You can also think about throughout with the following equation:
Throughput = (number of requests) / (total time)
How to Use the JMeter Constant Throughput Timer
Although the Timer is called the Constant Throughput timer, the throughput value does not need to be constant. This value can be changed during a test, just like in real life.
Several options that can be used to change throughput value include:
- Using a counter variable.
- Using a JavaScript or BeanShell function to provide a changing value.
- Using the remote BeanShell server to change a JMeter property.
The only parameter we need to decide in our test plan is where to put this timer. As my personal default, I place it into the root element of a test plan. It is also important to note that you should try not to use multiple Throughput Constant Timers. Using multiple timers may lead to confusion about the delays between requests in different Thread Groups.
Bottom Line
Remember that Constant Throughput Timer is only capable of pausing JMeter threads in order to slow them down to reach the target throughput. So make sure you have enough threads in order to guarantee the desired number of requests per second. Also, be aware that Constant Throughput Timer is precise enough only on the minute level. Therefore, you will need to properly calculate the ramp-up period and let your test run long enough.
Learn more about JMeter from our free 5 day JMeter Basic Training Course.
Now that you have built your JMeter test, you can scale it in BlazeMeter. With BlazeMeter, you can ramp up the number of users in your JMeter tests, test from multiple locations, generate test data, and more.
This blog was originally published on September 24, 2014, and has since been updated for accuracy and relevance.