Blog
June 17, 2021

If you are reading this article, you are probably at a point where you need to discover how to execute Selenium tests on Java using the TestNG framework.
When used with Selenium, TestNG makes it easy to control Selenium sessions, create and shutdown browsers and run tests in parallel with any configuration. In addition, if you need to log any Selenium event while running your tests, no problem, TestNG will handle it for you! Here, we will learn how simple it is to create a single Selenium test in TestNG. Let’s start practicing!
Why Use TestNG for Selenium Testing?
Back to topTestNG in Selenium is a powerful framework inspired by JUnit and NUnit. TestNG takes the advantages of unit frameworks, like simplicity and clear syntax, and extends them with the functionality to create any type of test: unit, functional, integration, etc.
How to Test Selenium With TestNG
TestNG Selenium Testing Prerequisites
To create a test you will need to have the following installed:
1. Java version 1.7 or above. You can download it from the official site.
2. Maven as a build tool. To download follow this link. Maven is a project management tool that helps you build your project and manage documentation and resources. In terms of this blog, we will use Maven to compile the Java code, download libraries like TestNG and Selenium, and run tests.
3. IntelliJ IDEA as Java IDE. The Community version will work. (Intellij IDEA is used as an IDE in this blog post to demonstrate the power of TestNG with Selenium, however you can use any IDE you are familiar with or are used to working with).
Creating a Project in IntelliJ IDEA
To create a project in IntelliJ IDEA select: File -> New -> Project. Select Maven. Click on Next.
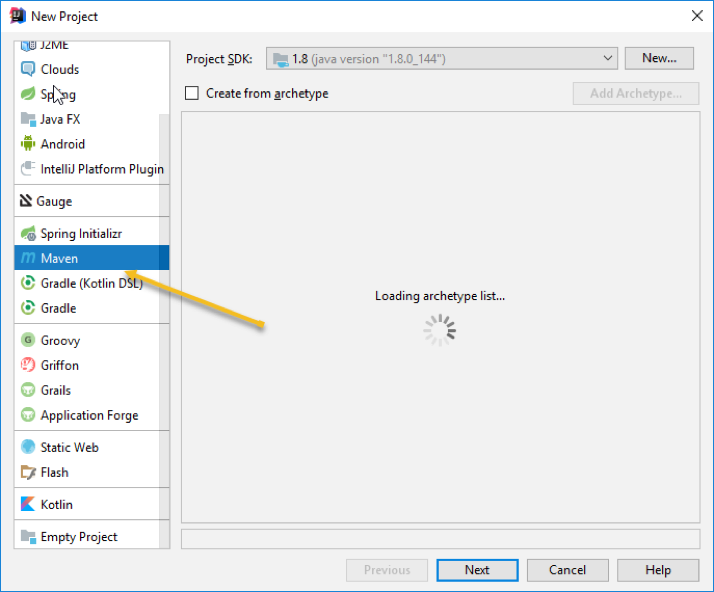
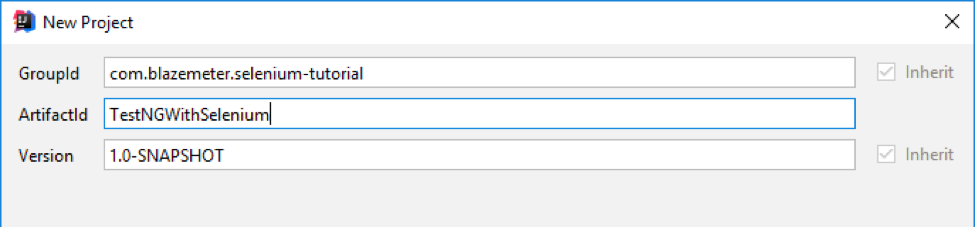
In the next step, specify a unique group id (consider a group as a tree of folders for your project), an artifactId (project name) and version.
Let’s review the created project tree:
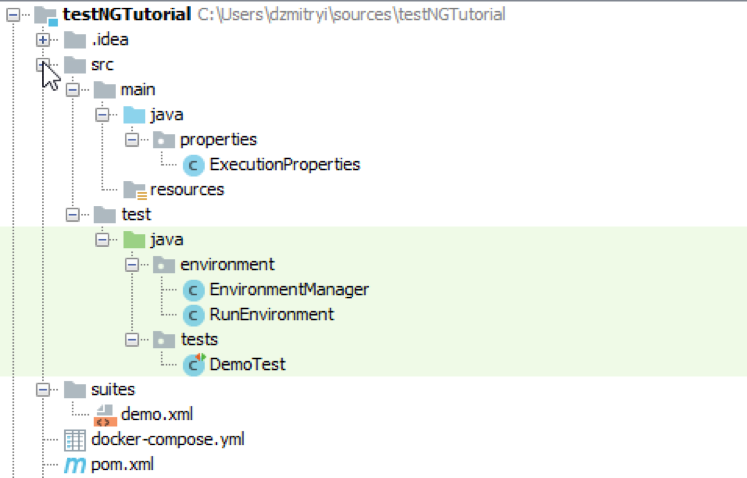
At the project root directory there is a “pom.xml” file, which is the configuration file of the project.
First, the dependencies from TestNG and Selenium are declared:
<dependencies>
    <dependency>
        <groupId>org.testnggroupId>
        <artifactId>testngartifactId>
        <version>6.11version>
        <scope>testscope>
    dependency>
    <dependency>
        <groupId>org.seleniumhq.seleniumgroupId>
        <artifactId>selenium-javaartifactId>
        <version>3.9.0version>
    dependency>
dependencies>
Deploying the Selenium Testing Environment
The next step is to deploy an environment to run the tests on. For this, you can use Docker. Docker is a tool that helps you virtually build your environment on one or several physical machines. Moreover, Docker allows you to build a complete infrastructure that is embedded or detached from the physical network.
The only thing you need is to provide a configuration file for the Docker machine and that’s it – you have a ready-to-use environment to run your tests without spending time on installing and configuring nodes! Really great, isn’t it?
Below is the configuration of the Selenium remote hub declared in the ‘docker-compose.yml’ file that is located in the project root.
selenium-hub:
  image: selenium/hub
  ports:
  - 4444:4444

chrome:
  image: selenium/node-chrome
  links:
  - selenium-hub:hub
  volumes:
  - /dev/shm:/dev/shm

firefox:
  image: selenium/node-firefox
  environment:
    HUB_PORT_4444_TCP_ADDR: hub
  links:
  - selenium-hub:hub
The configuration file is self-explanatory: we have a hub node that is bound to the 4444 port (this is the default port to start the remote server on. If the physical machine where you intend to deploy the environment is busy, feel free to use any other), with two nodes with Chrome and Firefox browsers.
We don’t need to care about what exists under those image files like selenium/hub. It can be any OS with the installed browsers or anything else you just need.
To deploy the environment, install the docker-compose tool. Once installed, execute ‘docker-compose up -d’ in the command line against the directory file where ‘docker-compose.yml’ is located
And done! Your environment is up with the help of Docker containers. In the example there are 3 containers deployed: selenium-hub, chrome and firefox.
Create Your TestNG Selenium Test
Now it’s time to create a simple Selenium test within the TestNG framework.
Below is the test that goes to https://www.blazemeter.com/selenium and verifies if the link to the home page is correct. The test is created in test\java\tests\DemoTest.java.
package tests;

import environment.EnvironmentManager;
import environment.RunEnvironment;
import org.openqa.selenium.By;
import org.openqa.selenium.WebDriver;
import org.testng.annotations.AfterTest;
import org.testng.annotations.BeforeTest;
import org.testng.annotations.Test;

import java.net.MalformedURLException;

public class DemoTest {

    @BeforeTest
    public void startDriver() throws MalformedURLException {
        EnvironmentManager.initDriver();
    }

    @Test
    public void NGDemoTest() {
        WebDriver driver = RunEnvironment.getWebDriver();
        driver.get("https://www.blazemeter.com/selenium");
        String homeUrl = driver.findElement(By.cssSelector("div#logo>   a#logo_image ")).getAttribute("href");
        assert homeUrl.equals("https://www.blazemeter.com/");
    }

    @AfterTest
    public void shutDownDriver() {
        EnvironmentManager.shutDownDriver();
    }
}
To identify a method as a test annotation, @Test is used. There can be multiple tests within a single class. There are 2 useful annotations used here: @BeforeTest and @AfterTest. The methods marked with these annotations are executed before and after any method (respectively) with the @Test annotation within this class (it worth mentioning that if you are extending from a class that has methods with @BeforeTest and @AfterTest annotations, they will be executed too).
TestNG offers great flexibility by introducing annotations such as @BeforeClass or @AfterClass to run methods before all tests in the class. To get the full list refer to the TestNG documentation.
In the example, the method annotated with @BeforeTest initializes the remote webdriver and the method @AfterClass shuts it down.
The WebDriver is initialized in the way defined below in test/java/environment/EnvironmentManager.java
public static void initDriver() throws MalformedURLException {
    DesiredCapabilities desiredCapabilities = new DesiredCapabilities();
    desiredCapabilities.setBrowserName(ExecutionProperties.getBrowser());
    RemoteWebDriver driver = new RemoteWebDriver(new URL(String.format("%s/wd/hub", ExecutionProperties.getHost())), desiredCapabilities);
    RunEnvironment.setWebDriver(driver);
}
And shutting down:
public static void shutDownDriver() { RunEnvironment.getWebDriver().quit(); }And shutting down:
public static void shutDownDriver() {
RunEnvironment.getWebDriver().quit();
}
You may notice that the EnvironmentManager doesn’t manipulate the web driver directly. Instead, the virtual container RunEnvironment ( in package test/java/environment) is used. This structure is defined to split the responsibilities of defining the way the driver is initialized and managing the webdriver instance.
The required browser name is loaded from the system property “browser” or the default value “chrome” is used.
The same goes for the host of the RemoteWebDriver. It should be the same where Docker containers are deployed. The default value is http://localhost:4444.
Now the test needs to be included in a suite file, which is basically a single file in XML format. A Suite file is useful to execute tests grouped together logically and it’s also a convenient way to execute tests via maven.
suites/demo.xml
DOCTYPE suite SYSTEM "http://testng.org/testng-1.0.dtd">
<suite name="Demo Suite">
 <test name="demo test">
     <classes>
         <class name="tests.DemoTest">class>
     classes>
 test>
suite>
Executing Your TestNG Selenium Tests
To run all tests in-suite, the maven-surefire-plugin is used.
<plugin>
    <groupId>org.apache.maven.pluginsgroupId>
    <artifactId>maven-surefire-pluginartifactId>
    <version>2.20.1version>
    <configuration>
        <suiteXmlFiles>
            <suiteXmlFile>suites/demo.xmlsuiteXmlFile>
        suiteXmlFiles>
    configuration>
plugin>
The suiteXmlFile is the path to the required suite file. In the example, the hard-coded path is used, however in the real world it is advised to pass it as an environment variable to execute required suite. This rule will keep your code flexible enough to switch to different suites without modifying the code.
Now you can run tests with maven by running ‘mvn install’ or ‘mvn test’ in the command line. There is also an option to run a single test with the command ‘mvn -Dtest=DemoTest test’, where ‘DemoTest’ is the name of the test to run.
You can also skip all these steps and upload your script (in java and yaml) to BlazeMeter, and easily run it.

TestNG Selenium Test Results
By default, TestNG produces xml and html reports. The HTML report of the executed test:

The default report is not informative enough, but there is an option to provide your own Reporter by implementing interface org.testng.IReporter and including it into the surefire-plugin configuration in maven pom.xml:
<property>
              <name>reportername>
              <value>listenReport.Reportervalue>
            property>
Back to top
The Best Solution: Selenium, TestNG, and BlazeMeter
That’s it! Following this guide you can create and execute tests using TestNG, Selenium and maven. You might say that in the real world, tests are much more complex than in the example, and you are right. Therefore, we recommend going deeper into TestNG features by browsing the TestNG official documentation.
TestNG offers many more features than just @Test and the @Before and @Ater annotations. You can provide data providers to implement data-driven testing, you can specify custom listeners and reporters, run tests in parallel on any level and so on. So start testing now.
Related Resources