Blog
February 16, 2021

In this article, you will learn how to use Swagger UI for API testing. Let's start by discussing Swagger UI and why it’s worth using, and then move on to the tutorial.
Back to topWhat is Swagger for API Testing?
Swagger (now known as the OpenAPI Initiative, under the structure of the Linux Foundation) is an open-source API testing framework for describing your API by using a common language that is easy to read and understand by developers and testers, even if they have weak source code knowledge.
You can think of it as a blueprint for a house. You can use whatever building materials you like, but you can't step outside the parameters of the blueprint.
Swagger has certain benefits compared with other frameworks, such as:
- It's comprehensible for developers and non-developers. Product managers, partners, and even potential clients can have input into the design of your API, because they can see it clearly mapped out in the friendly UI.
- It's human readable and machine readable. This means that not only can this be shared with your team internally, but the same documentation can be used to automate API-dependent processes.
- It's easily adjustable. This makes it great for testing and debugging API problems.
Take your API testing to the next level with BlazeMeter. Start your BlazeMeter free trial to learn how >>
Back to topWhat is Swagger UI?
Swagger UI, a part of Swagger, is an open source tool that generates a web page that documents the APIs generated by the Swagger specification. This UI presentation of the APIs is user friendly and easy to understand, with all logic complexity kept behind the screen. This enables developers to execute and monitor the API requests they sent and the results they received, making it a great tool for developers, testers, and end consumers to understand the endpoints they are testing.
Swagger UI represents APIs within a browser, so it is more intuitive than other tools such as Postman, SoapUI, and others.
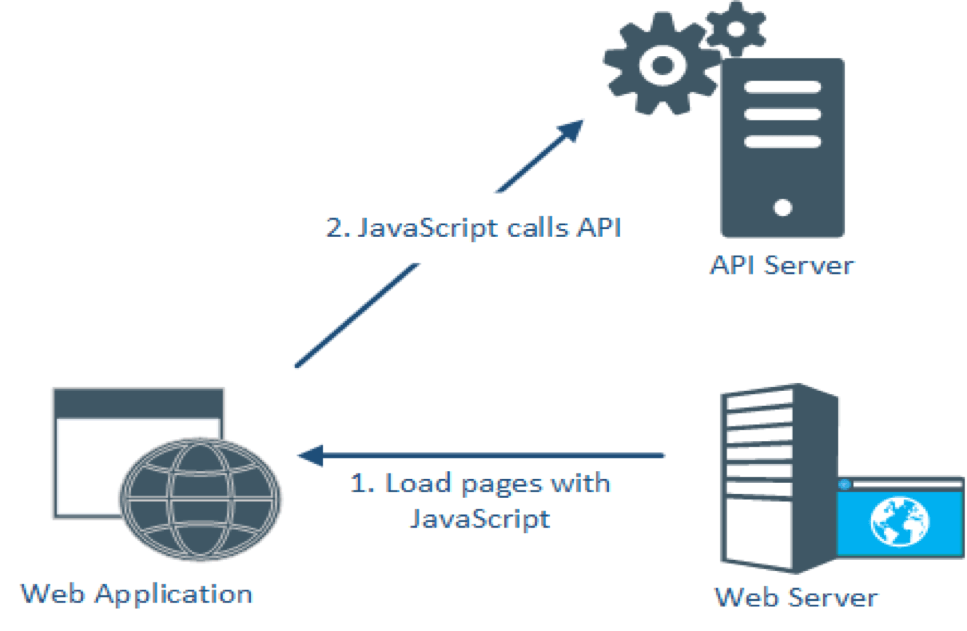
When you open the webpage, the browser will load the webpage from the web server, and trigger requests to the API server to get data from a database. SwaggerUI is automatically generated from any API defined in the OpenAPI Specification and can be viewed within a browser.
Let's go over some of Swagger UI's common practices.
Back to topAdding Swagger UI to Your API Testing Project
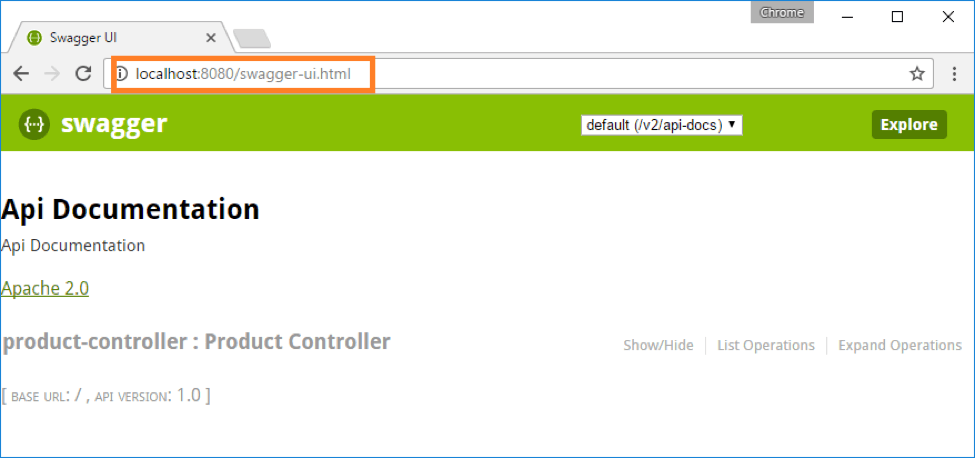
To add Swagger UI to our project, you need to add one more dependency (if not already added) to the pom.xml file.
<dependency>
<groupId>io.springfoxgroupId>
       <artifactId>springfox-swagger-uiartifactId>
       <version>2.4.0version>
dependency>
Then, go to the url with SwaggerUI: :/swagger-ui.html">http://:/swagger-ui.html
Swagger API Testing
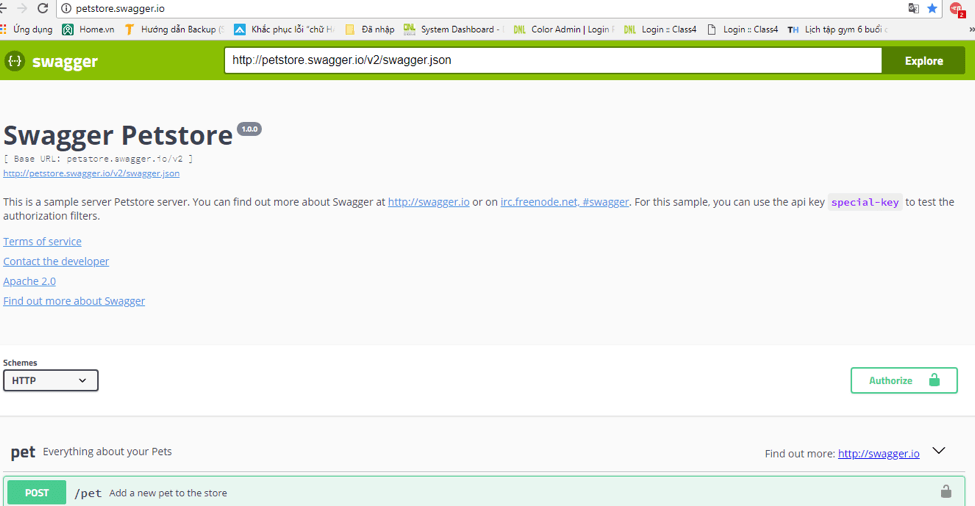
You can also use Swagger UI for testing APIs online. Let’s look at an example using the sample: http://petstore.swagger.io/
Importing a Swagger Definition
First, you need to import the API platform into Swagger UI
A Swagger API platform could be either in YAML or JSON format. In this case, we will use JSON.
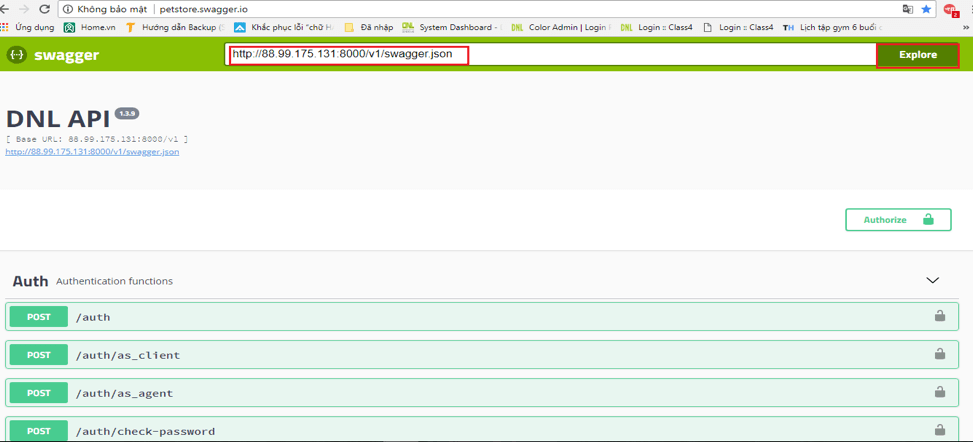
Then, put the Swagger API url into a blank field and click the Explore button. This will list out all the endpoints below.
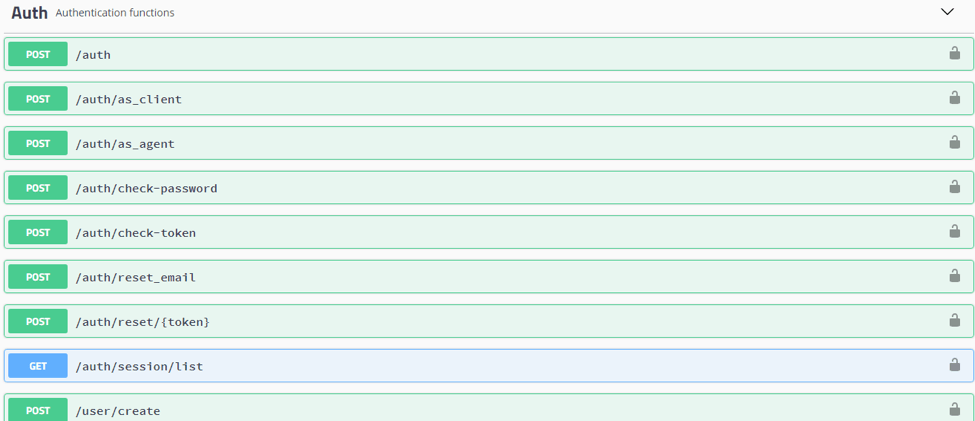
Authentication
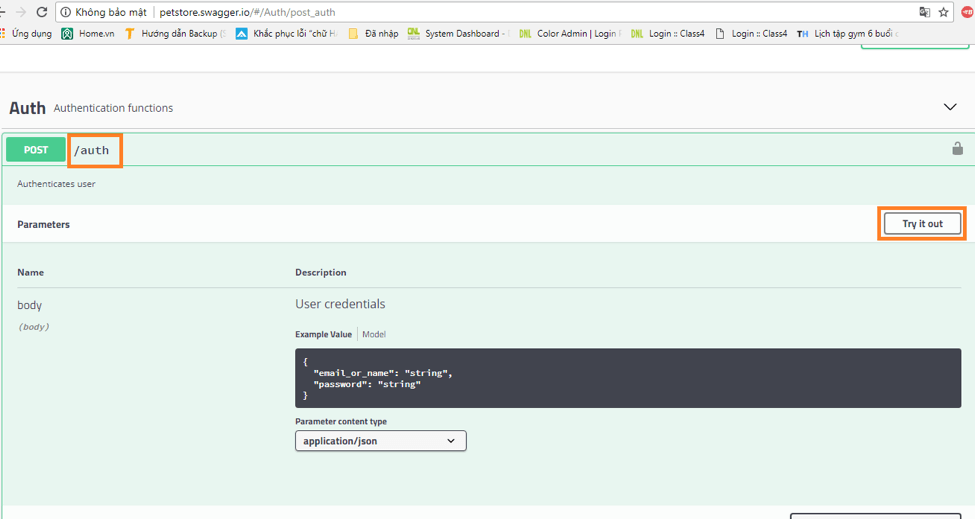
When you first run your tests, they may fail due to HTTP request requirements like auth, headers, or query parameters. Expand /auth, click the Try it out button, and enter your account information.
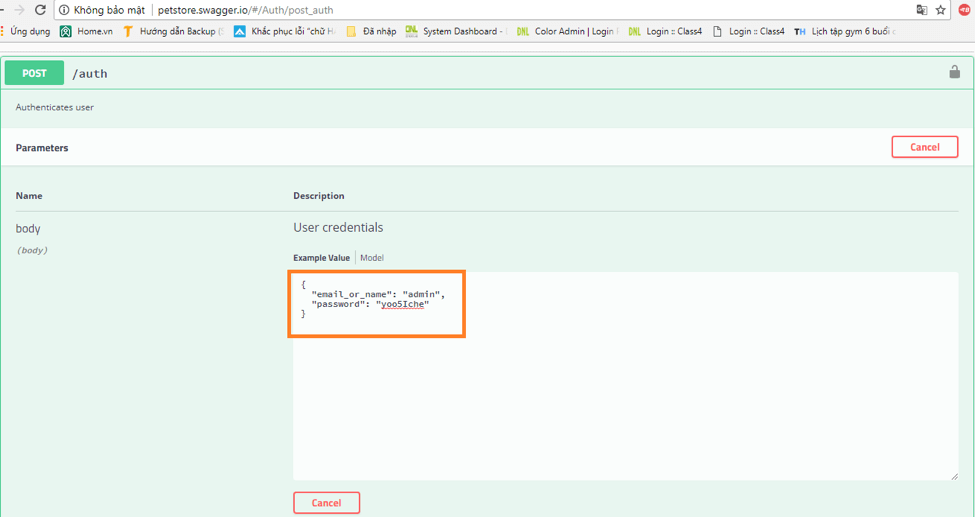
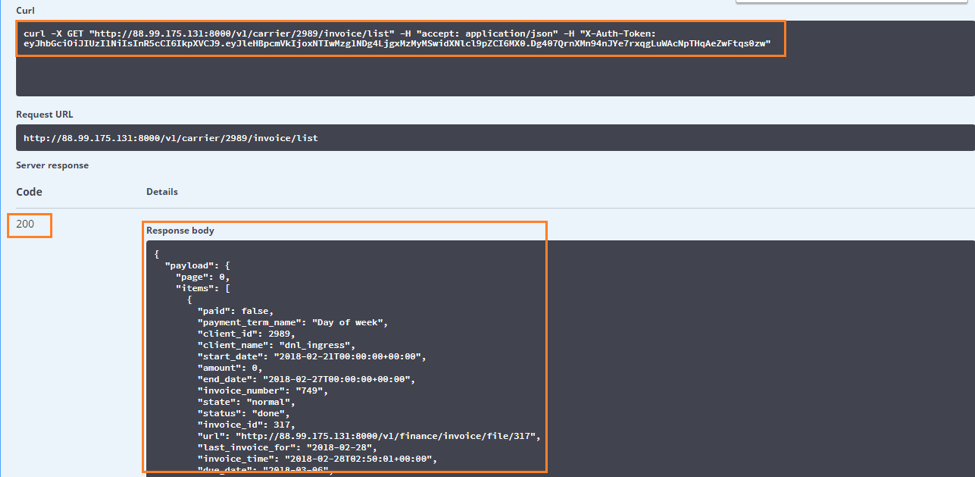
Next, press the execute button. It will respond with a failed or passed result. In this case, it responds with a passed result and a response code 200.
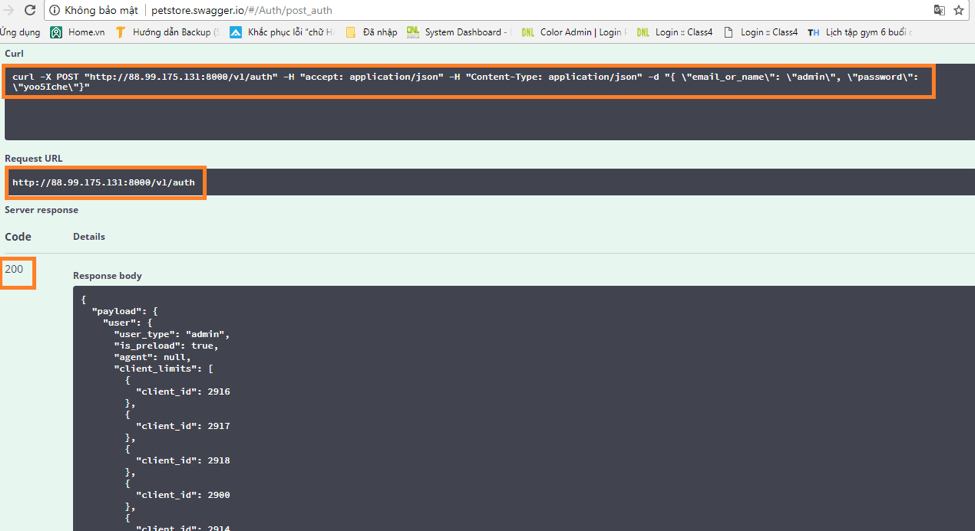
Besides that, you can get more detailed information like: request url, curl command. Take the token string and put it in Authorize.

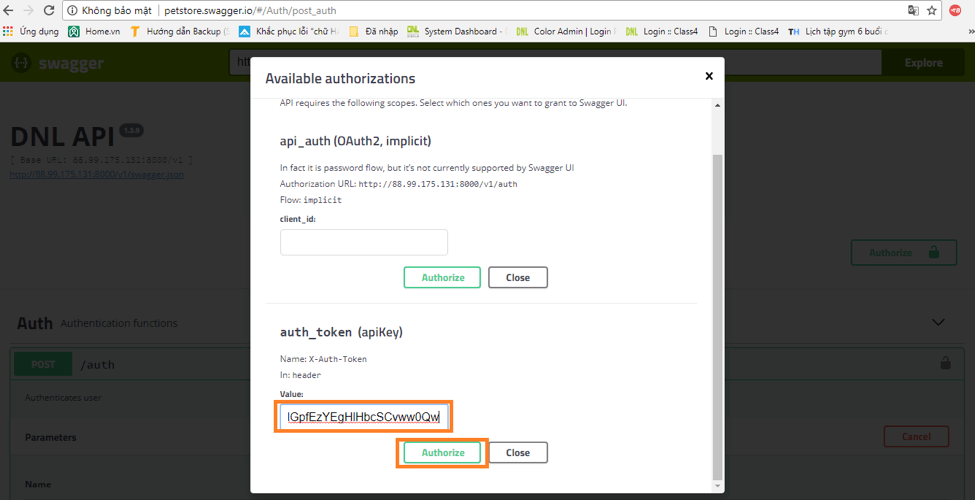
Currently, there are 2 ways to authorize:
- api_auth (OAuth2, implicit) and
- auth_token (apiKey)
but for now Swagger UI only supports auth_token (apiKey)
Testing the APIs Manually
After the authorization step, you are now ready to test the API. Let’s run an example:
First, make a GET request
1. Expand GET carrier/{client_id}/invoice/list
2. Click Try it out

3. Enter information parameter like: client_id=2989
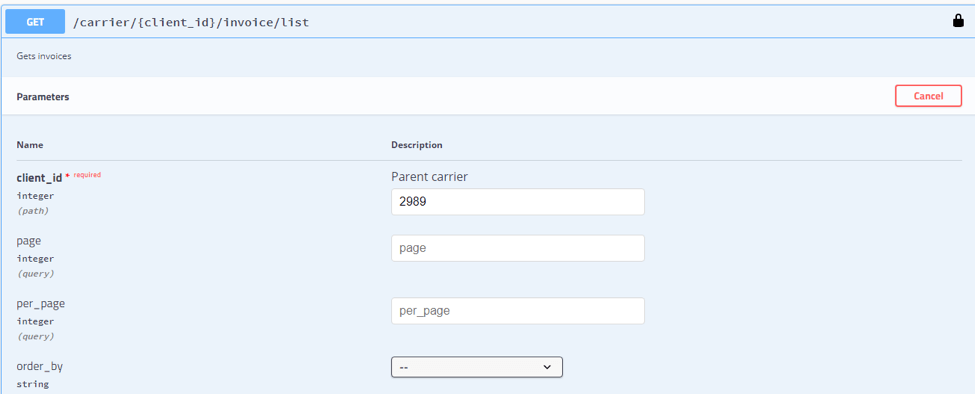
4. Click the Execute button to show your results.